I think the head unit is the biggest upgrade...it adds that instant aesthetic appeal to your dash, looks awesome, has a ton of features, and believe it or not can get better sound out of the pathetic factory speakers. But that said, all the bells and whistles in the world can't make the speaker set in the 130 set-up sound anywhere near the level the car deserves.
The next biggest improvement following the head-unit would be the front door speakers, which are 6x9s.
Let me begin by saying the sound stage, particularly for the front segment is pretty bad. Where the speakers are positioned in the doors leaves a lot to be desired. The best improvement you could get is to install a set of amped, front component speakers. However, to maximize this set-up you would need the Tweeters custom mounted. For the life of me, I don't know why the factory realizes this on the Ram line up and not for the Challenger. Tweeters can tuck under the dash, but you are not taking full advantage of the set-up. You would really need to modify your A-Pillars to take the tweeter. If you aren't up for cutting that stuff up, or buying and modifying aftermarket pieces (roughly $500 or so), then you might really question the component route. For some it won't be a big deal, but me personally I couldn't justify a $300 A-Pillar on the driver's side, and then paying some hellacious fee for the passenger side that I'd have to slice and dice myself. In the end, it is probably worth it, but this build stretched my budget as is.
The next logical step is to replace the factory 6x9s with some top-shelf aftermarket pieces. I've mentioned my affinity for Infinity before, so selecting the Kappa was a no brainer.
I went with the Infinity Kappa 692.9i
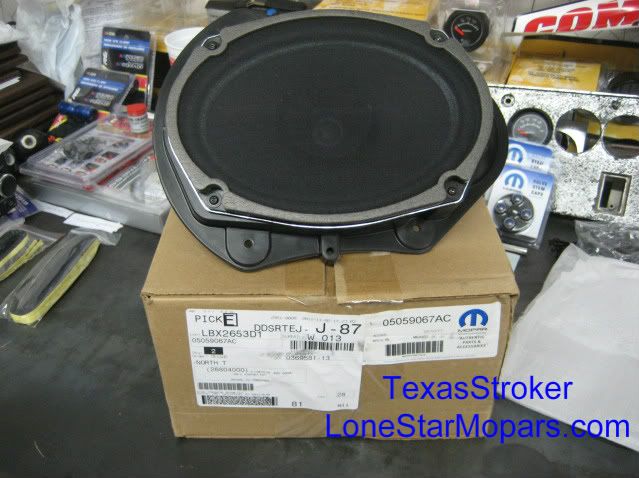
As you might have guessed ,the massive Kappa is NOT a plug and play upgrade. Honestly, anything that is would scare me given how meek the factory offerings are. So you will need to modify your factory speaker pod. If you don't care about modifying your stock piece, go ahead and do that. I picked up this extra set so I could go ahead and keep the factory stuff in-tact should I ever want to "return it to stock" (which will not happen as long as I own the car). Of course, the baffle/pod is not a stand alone part number, so you have to pay to get another set of the mediocre speakers...go figure.
Why they would pair the speaker and baffle together is beyond me. I can seldom see an instance where the baffle will need to be replaced, but if you keep the factory speakers, they'll blow in no time as you try to hear your tunes with the window down.:
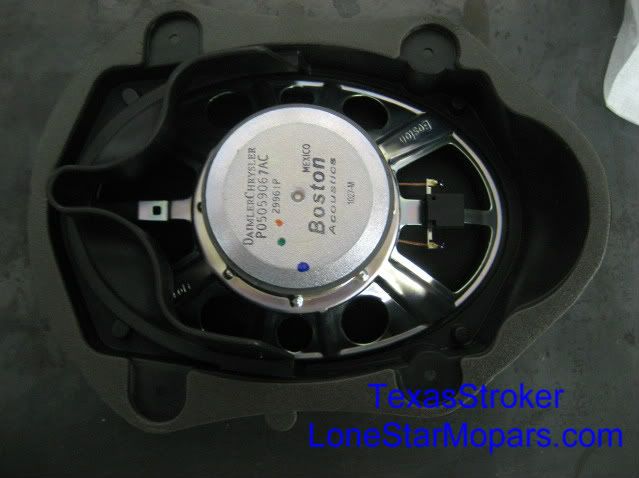
I specified I wanted the factory replacement for the 130-4 Speaker, mainly because the cost should be about $15, which in Chrysler world translates to $45. I was shocked when these checked in north of that figure, but it is the price you pay to keep things stock. Also of note, is I somehow got the Bostons, which would be what those of you with the factory 6-Speaker set-up have. Here is a view from the back:
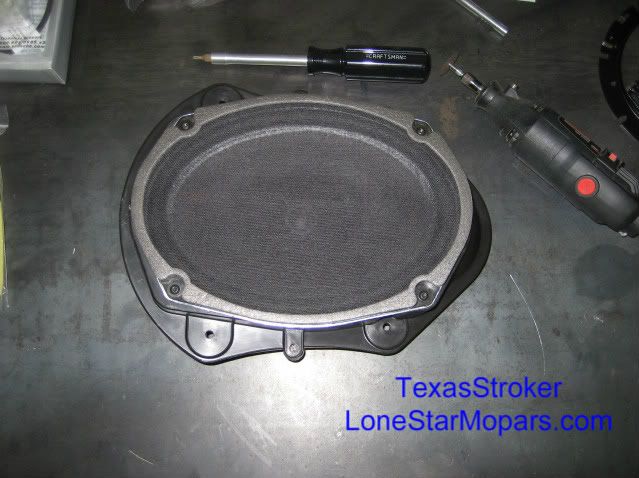
And here they are about to be pulled without ever having been powered-up:
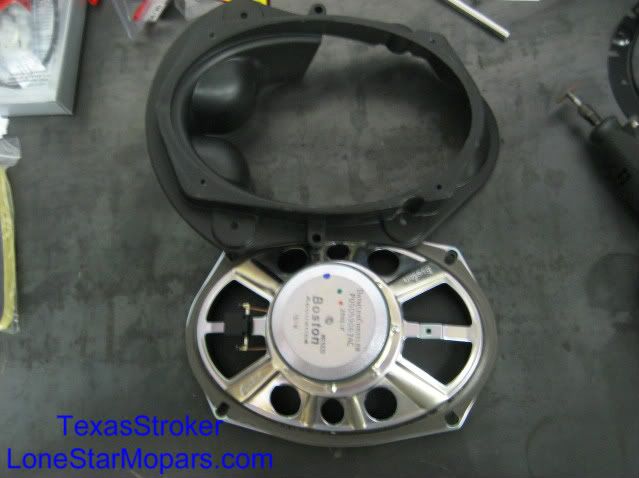
In another stroke of brilliance, the factory ran standard #2 Phillips screws to hold the speaker pod to the door, but went with a Torx 15 (If I remember correctly) to hold the speaker to the pod. Again, you tell me...I guess they are pretty proud of these things, they must have never listened to them.
And here it is disassembled. I would personally suggest you just install a #2 screw with your new speakers...there is no reason to replicate stupidity or complicate your life decades down the road...also note the rotary tool lying in wait:
Next up is what I am deeming the "Corner Pocket Mod." As many of you know by now, I am not on the late model Challenger forums due to a disagreement in fundamental principles. That said, when I searched for insight on how to perform any stereo stuff it was shocking...It seems virtually everyone that has done this either keeps it to themselves, or just gave a blank check to the local installer. What you mainly find is an audio-rookie asking questions and then 2-3 self-appointed audio-pros telling them how stupid they are for asking questions, but that is another story.
Essentially what you run into is the fact that almost any decent aftermarket speaker has such a significantly larger magnet the basket, or framework, of the speaker will make contact with those bulges on the factory speaker pod. This means you will not be able to position the aftermarket speaker and tighten it down. You can make custom mounts, or you could just do the Corner Pocket Mod. Basically just use a rotary tool (I tried melting it like many Ram owners do and was not happy with the results). A standard rotary tool makes a much better end result in my opinion:
You can see what you need to trim...it doesn't take long at all, particularly on your second pod. Depending on what speaker you went with you may need to take less, or a bit more...this gives you a nice idea either way. The Kappas absolutely dwarf the factory Boston and I can't imagine many 6x9s having a bigger structure.
One thing to note is I suggest you leave structure, that is DO NOT CUT all the way through or out. Simply trim down and to the sides until you can clear the speaker. The structure you leave behind will keep the rigidity solid and you won't have any vibrations to worry about:
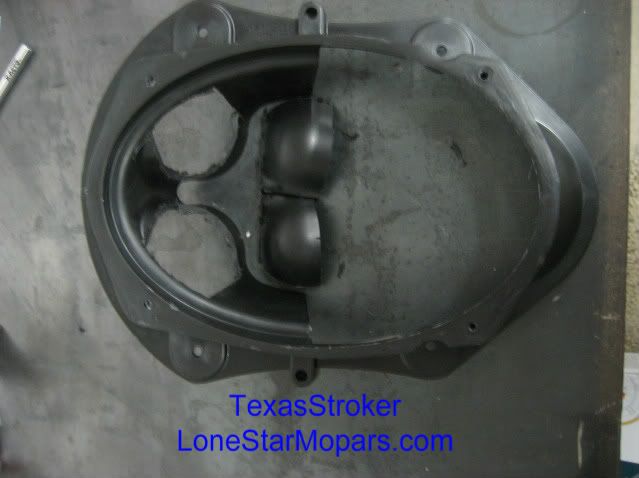
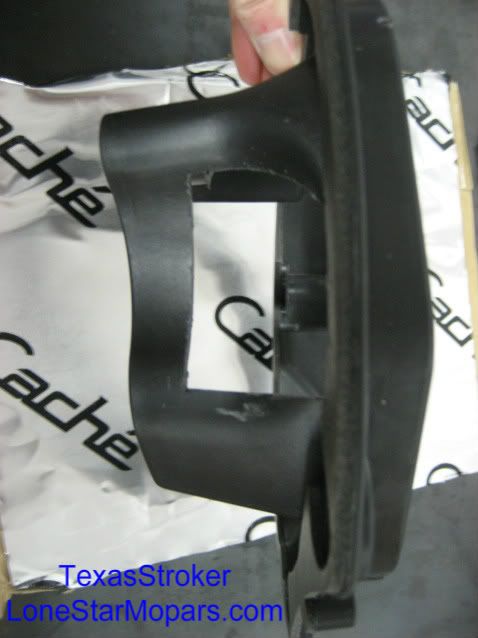
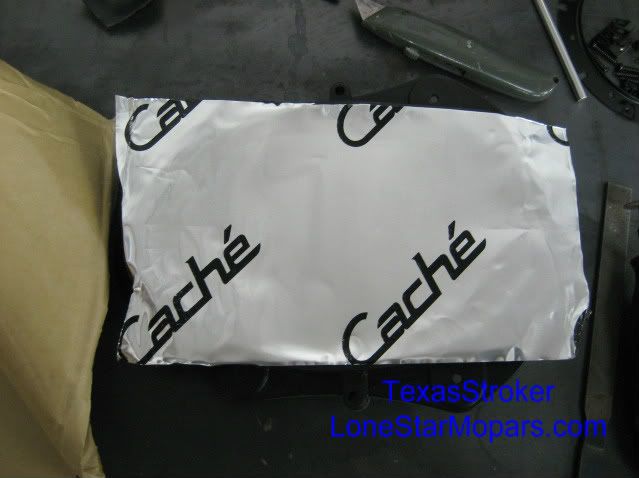
Speaking of vibrations. I shopped around for this whole build and was able to score "free" sound deadener with one set of my Kappas...that turned out to be enough for probably 3-4 installs. I know most of you will be familiar with Dynamat, but is is all basically the same thing. The stuff I got is Cache and I was impressed with it enough to use it for the job.
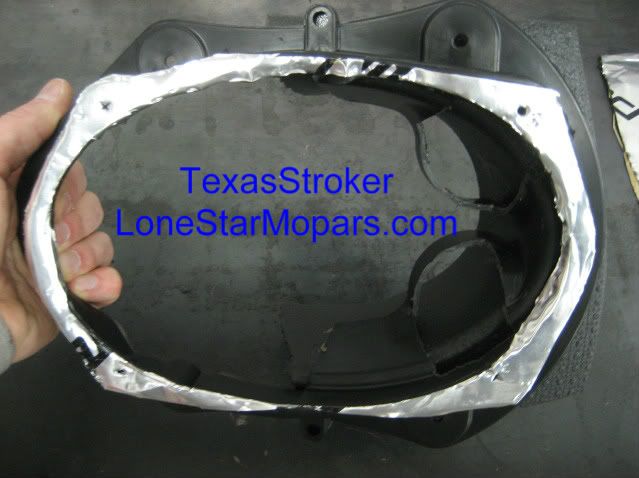
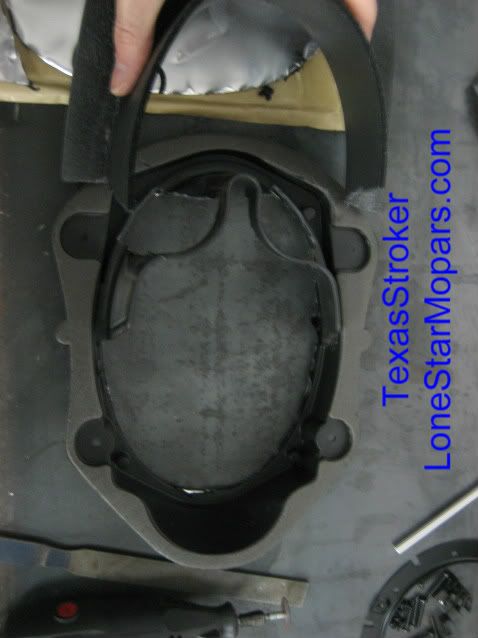
Since I wound up with so much more than I expected I went ahead and lined the speaker pod itself. Simply cut off a section larger than the pod, place the pod face down, trace the outside line, and trim with a box-cutter. Nothing challenging here:
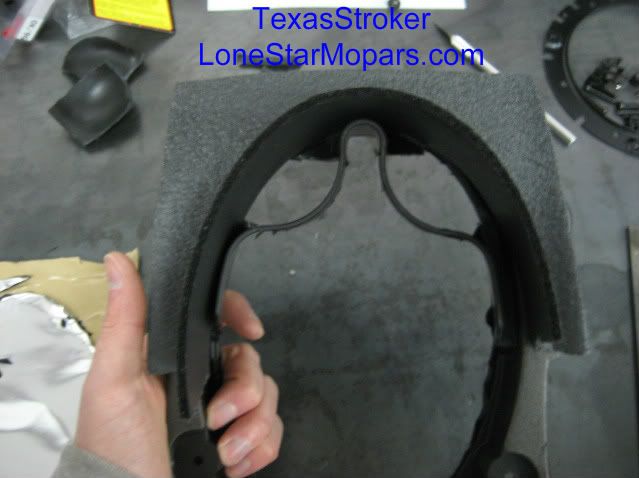
Now trim the excess off the edges, and the egg shape in the center:
We are almost ready to mount the speaker, but there is one more critical step. Since we removed portions of the pod/baffle, which serves as a watershed, we need to replace that. My initial idea was to make a clay mold and glass it...well, that didn't go so well.
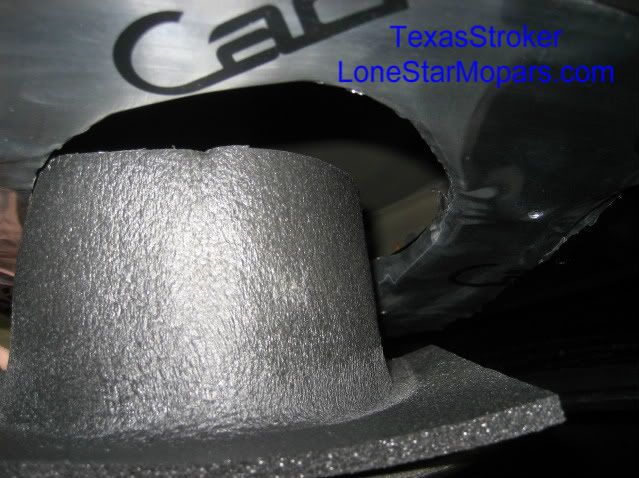
My next idea, which is far easier, more cost effective, and much quicker was to use a baffle. Don't get alarmed, I'm not about to stuff a full baffle in the door. While some people like the "added" sound you get from a baffle, I do not...especially in this situation. If we were mounting 6.5s in the rear deck and had a custom box with 2 12" Subs, then yeah, I might try the baffle out, but in the door there is no need.
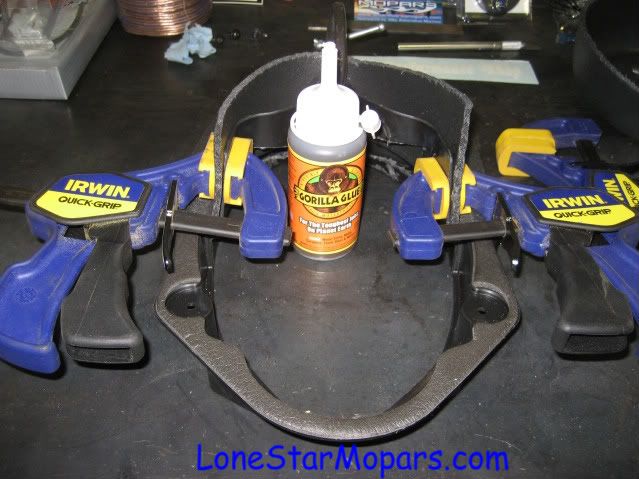
I bought 2 Stinger XTC Baffles, and found you only need 1 of them! You simply cut it in half, trim off the base, go ahead and leave as much as you'd like to maximize the watershed, no reason to not exceed what the factory did, plus chances are your aftermarket speaker will be much "deeper" than the factory pieces.
To join the baffle to the cathedral shaped portion of the speaker pod I scuffed the plastic with some 1,000 grit sand paper, cleaned it up, and used Gorilla Glue. It made for a very nice bond. I utilized clamps on both sides of the structure, and one at the apex:
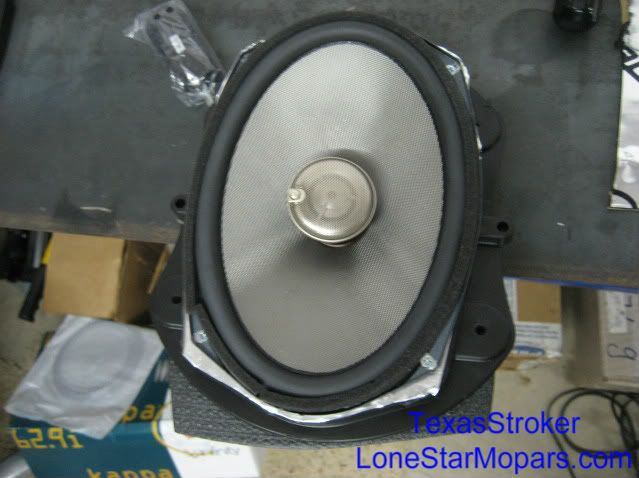
With that done, we are ready to mount our Infinity Kappa in our modified Speaker Pod:
We are still not ready for installation just yet, first we've got to prep the door.
Clearly, you will have to remove the door panel, but fear not, it is a simple task easily accomplished with basic hand tools. Having an extra set of hands won't hurt either.
There are 4 Push Pins on the Door Latch Side and 3 Push Pins on the Front Fender Side. You will also find 3 #2 Phillips Screws lining the bottom of the door panel. The last 2 #2 Phillips Screws are behind the door handle and behind the door pull.
With everything disconnected, pull out, keeping the lock knob in mind, and start to release the pins. The only real challenge here is balancing the door panel on your chest and disconnecting the wiring. There is wiring for the Power Locks, Power Windows, and Door Lighting. Take your time, get it all loose and the panel is out of the way.
Now you just need to remove 4 #2 Phillips Screws to access the factory speaker wiring and get it out of your car. That leaves you with a blank door panel and 4 pads snapped in to hold the speaker pod in place.
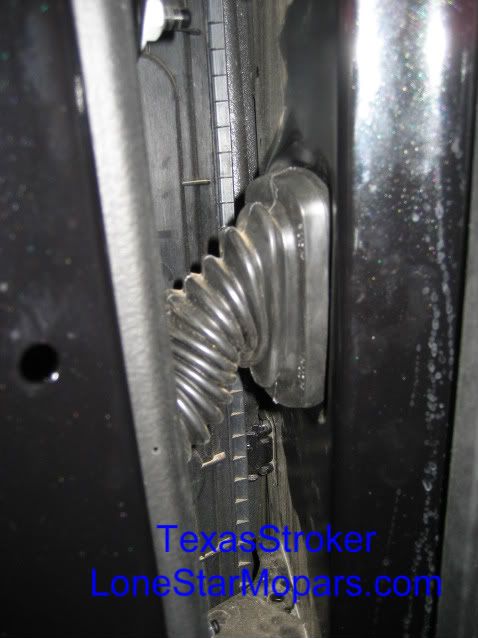
Before moving forward, we just as well get the speaker wire in place. This SHOULD be easy, but turned out to be a pain, mainly because the bulkhead was so hard to get out. If you've got small hands it shouldn't be an issue. My hands could barely access the backside and the doors on late model Challengers don't have that gap like stuff from the 60s-70s did.
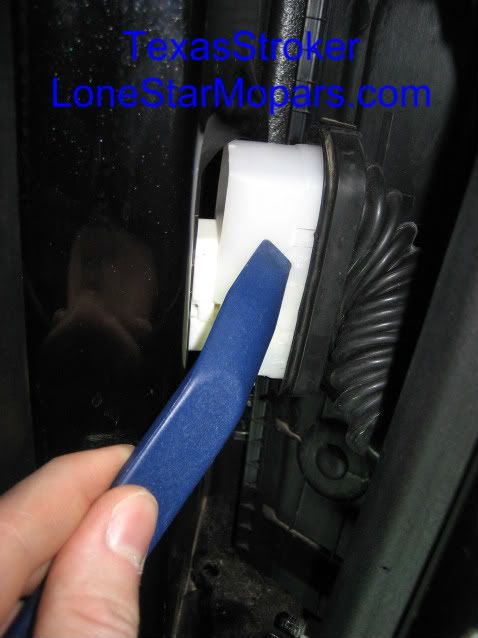
The dustboot covers the white piece that has 4 pressure points. Basically equilateral on both sides. The trick is to get them all, but to do so one at a time and keep it recessed enough to allow you to pull it out. If this was say in the center console it would be a cake walk...the limited access makes it very challenging. The first one took me forever, the second about 10 minutes (and that is knowing what to do...again, the tight quarters complicate this).
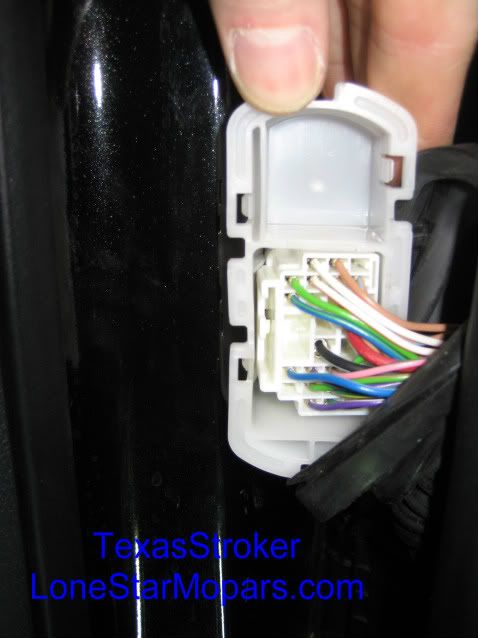
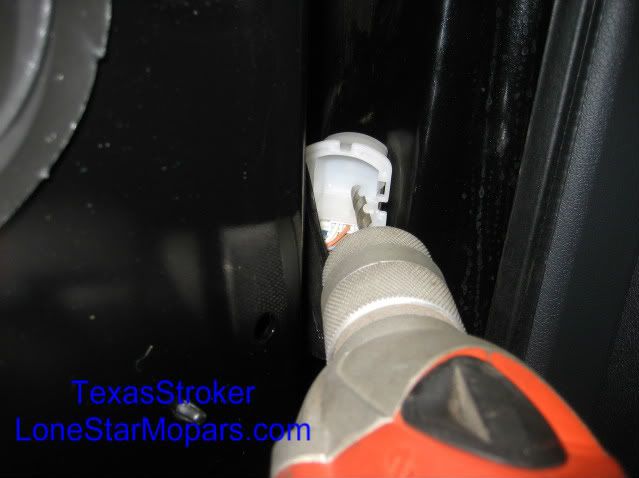
Once you have it out of the body, remove the dust boot my pulling it off the lip, and you will see the bulkhead...Yeah, good luck wiring into that. What I elected to do is drill. I utilized a 1/4" Bit and that was just the size for the wires to slide thru with no binding. This stuff cuts and files great so chaffing is a non-issue given it is plastic. The cool thing is there is a parting point of some sort that almost serves as a center punch...Find it:
And Drill:
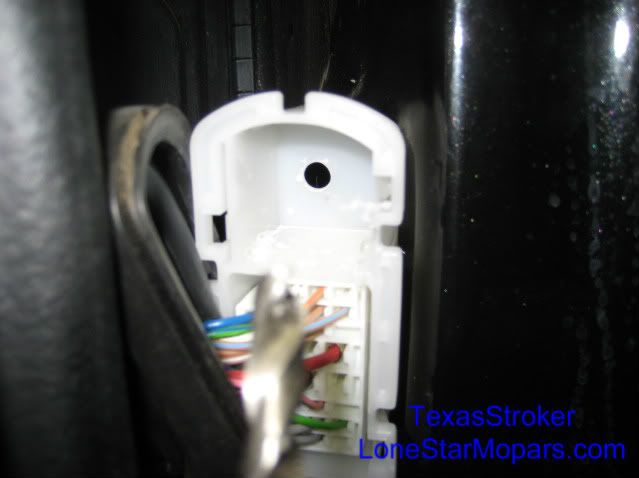
Here is the finished piece:
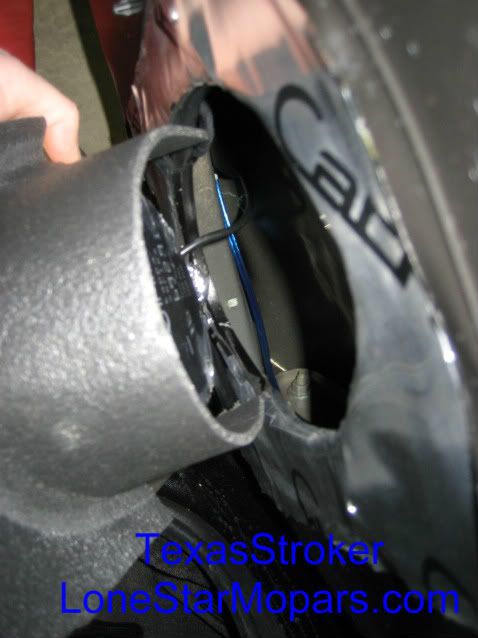
And here are the speaker wires passing thru to the door:
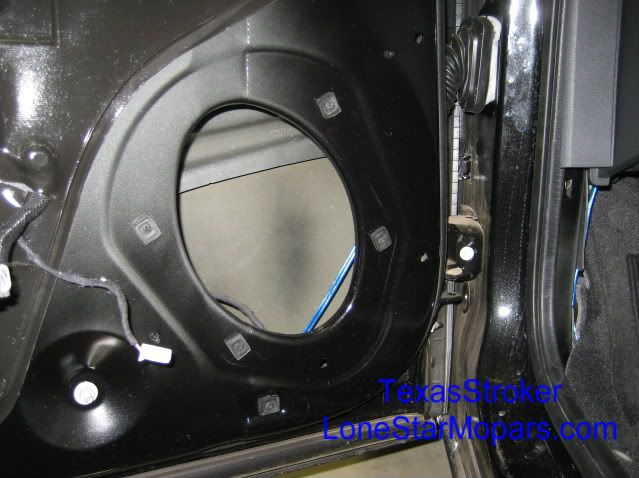
I had planed to pull the screw retainers for the speaker pod, but found they didn't want to seat well coming thru the Cache mat. With that in mind, I thought of keeping vibrations to a minimum and made the decision to install the mat OVER the hardware. This worked out great as some that were already "loose" now had no where to rattle. They are the four padded pieces you can see:
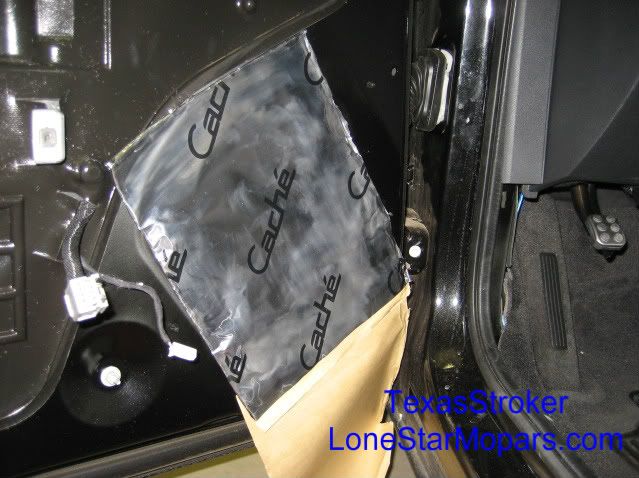
Go ahead and cut a piece of mat to cover the hardware. Make sure you don't also cover the lower pad (3rd screw for the door panel), or the holes to the door jamb side as they are for the push-pins:
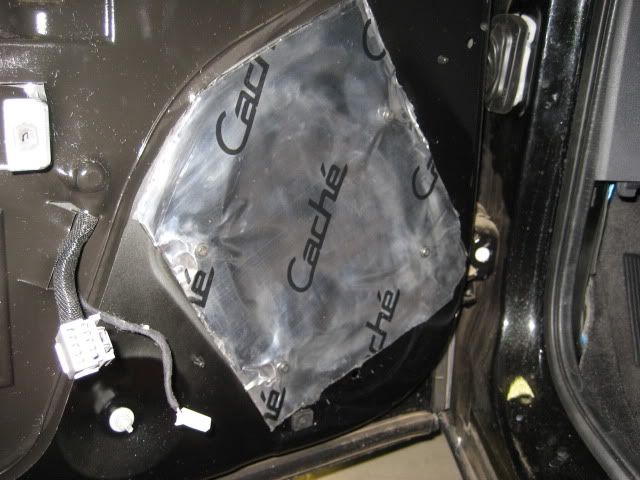
As you can see, you just peel back a little of the backing, start at the top, and work your way down. Smoothing things out as you go. I would also suggest that you find the "raised" spots as they will be the pads for your screws holding the speaker pod in place. I like to thread the hardware in to make sure I've got it located:
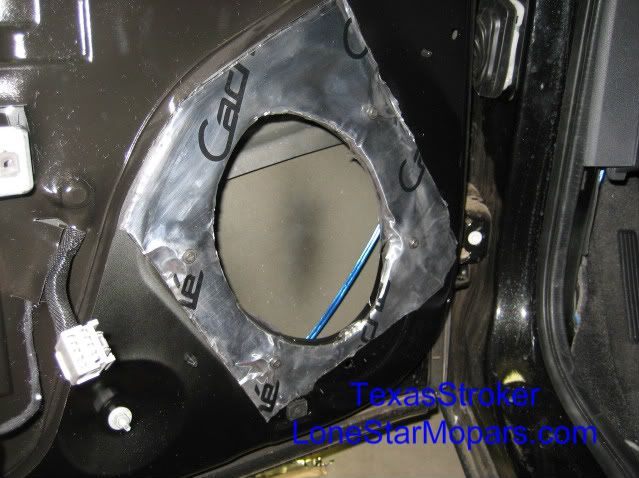
At the same time, you can go ahead and trim off the mat as you like. Now we are ready to cut out for the speaker opening. Find the edge, you can actually see it in the mat, and trim just inside of it...this will allow you to bend a little over the door lip and really provide that firm, no-vibration surface you want for your aftermarket speakers:
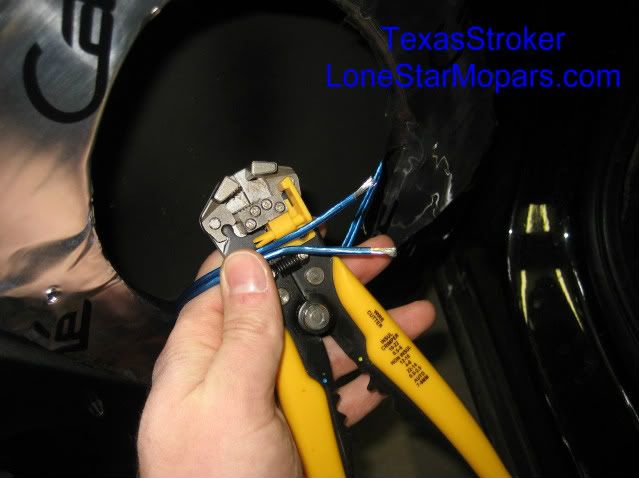
Don't install the speaker just yet, we still need to terminate the wiring. As you recall, the slick StreetWires Speaker Cable we ran features the "white +" one one side to denote positive...this seems simple enough, but if you bought cheap wire without a tracer it is easy to forget which is which. Most speaker wire will at least have that tracer for you, but this just makes things extra nice. Go ahead and trim back about 1/4" of wire:
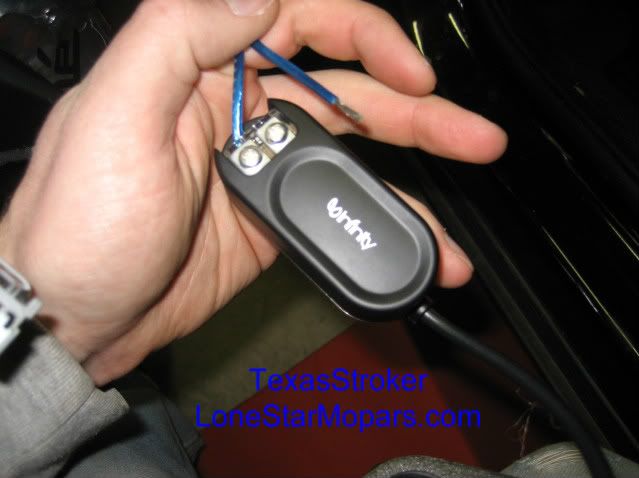
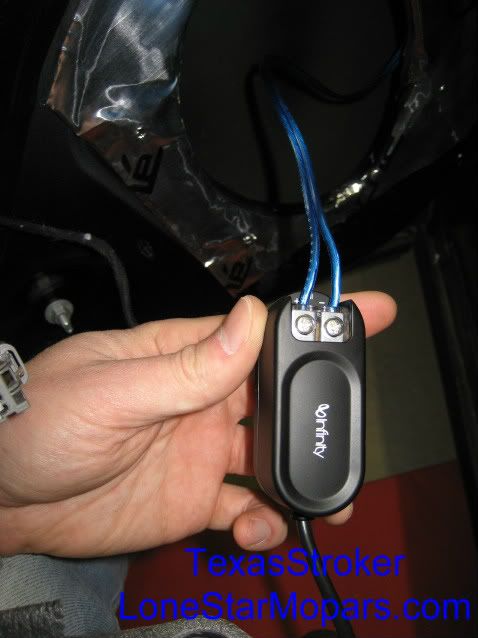
Now, wire it up by simply matching your speaker wire with the Infinity Direct Connect Crossover:
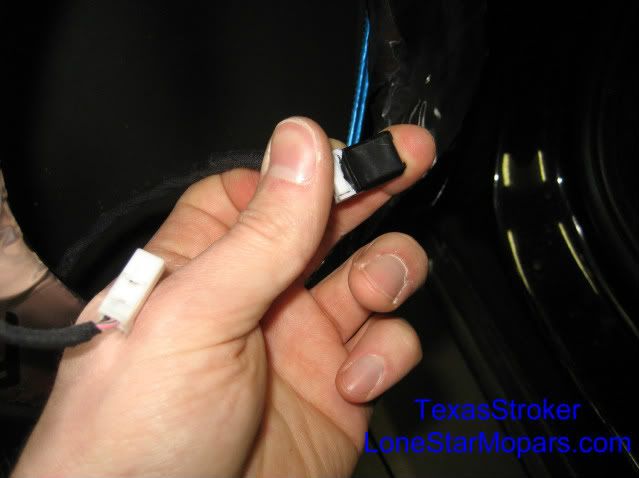
But we are still not done! It is often the little things that set apart good work and great work. Most audio installers will over look this, and you will never think to check it. Since we have spent all this time doing things right, why not take the extra 10 seconds to tape up the factory speaker connection. You don't know how it will set, or what your car might be exposed to, and this little bit of tape will prevent moisture from getting in the connector:
Now, you can go ahead and install your brand-new, state-of-the-art speaker, nestled in your modified speaker pod.
Check out the depth we have with the cut-baffle for the watershed:
And again, showing the magnet and cone:
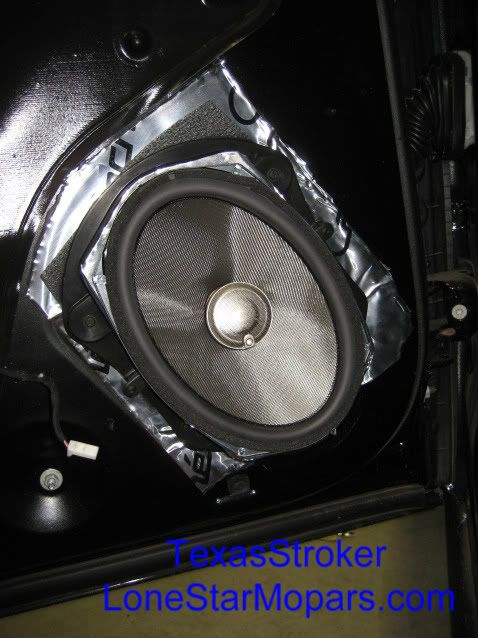
Here is a shot of the final installation, quite the upgrade, eh?!
It looks great doesn't it? Far more impressive than what you pulled out from the factory. To sweeten the pot, you've got the speaker nestled in a pod with better watershed and sound deadener all around. Oh, and let's not forget this isn't about looks...it is about performance! Your speakers will no doubt blow the factory stuff out of the water, I know these amped Kappas sure did. But before you go connect the battery and shut the door don't forget...we need to reinstall the door's bulkhead!
This was one of the more challenging aspects of the install believe it or not...I had a heck of a time getting the thing out, granted now I can do it in no time, but that is the price of doing it yourself and not having any knowledge base to refer to...The great news is, the installation is super simple.
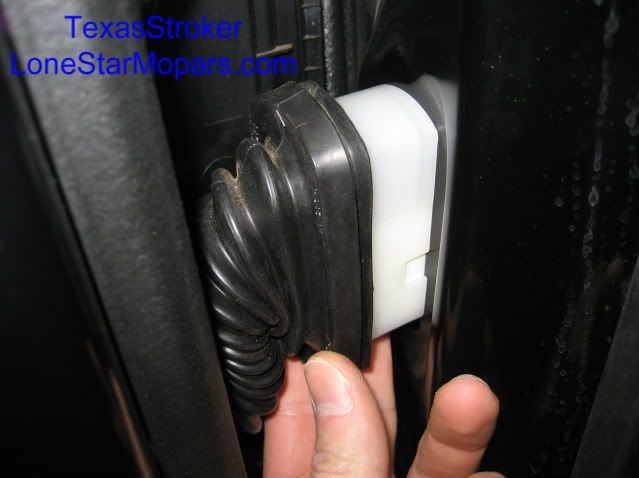
Simple press the white bulkhead into place:
And then position the dust boot accordingly, if you haven't already:
No one would ever know you've pulled it, drilled it, and ran speaker wire thru it...a perfect installation!
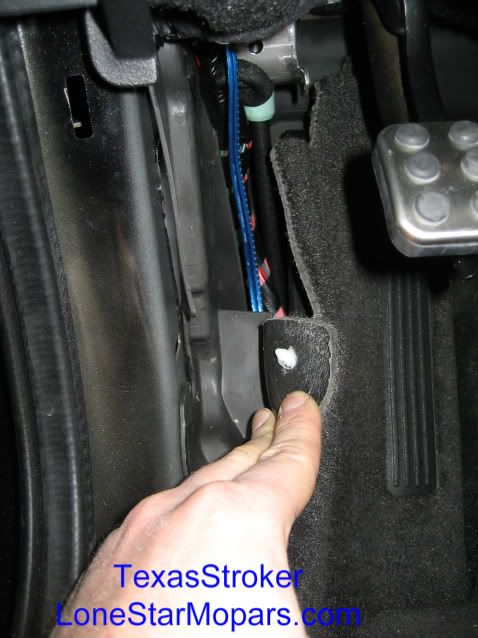
Next up of course if tucking away the speaker wire. This is pretty simple as you just run it from the door's bulkhead, down the kick panel, along the rocker panel, under the rear seat brace, into the trunk, and back to your amp. In my case the amp is in the right-rear, so I chose to conceal the wire and keep it safe by running thru the rear deck, just like the factory wiring. Then I pull it out behind the rear wheel well and wire it up to the Amplifier's Speaker Outputs.
Here is a look at how I tucked it in behind the rubber shield at the kick panel:
Now all you need to do is test the sound. Make sure you like it. Feel free to play with the +/-3 dB settings if you went with Kappas like me. You can also swivel the Tweeter. I aimed/tilted it up as close to a direct path with my ears as possible.
Once you are satisfied, reassemble the interior, stick on the door panel, and go cruising. You can finally hear AND feel your music. Similarly, you can roll the windows down on a nice day and actually enjoy listening to your music...it is clear and crisp, audible, and most importantly not distorting like you remember with the factory equipment.
After getting this done, the Mopar 10 has a sound system it deserves and should have had all along. Like I've said,, this was by far the most disappointing aspect of the car, and one I didn't anticipate. If you feel the same way about your Challenger or late model Mopar's stereo, I know this is a mod you will want to undertake.

No comments:
Post a Comment