Cloud 10, Phase 4: Blue LED Trunk Lighting
So, first let me say, that due to things mentioned in the previous post, "Cloud 10" has yet to fully be documented or explained here...I plan on going back and creating new posts to cover that. Here are some basics:
What is Cloud 10?
Cloud 10 is the Project Name I gave to lighting up the M10. You often hear the old adage about being on "Cloud 9" right? Well, Cloud 10 takes that and 1-ups it...in true Mopar fashion.
Since my car has the blue stripe...and black and blue is one of my favorite color combos, I chose to accent the M10's factory appeal with some subtle, custom lighting. Phase 1 was simply swapping over to Blue LED Bulbs. Phase 2 was the sweet Blue LED Footwell Lights. Phase 3, which I had beautifully documented, but put off for other things, was underbody lighting. Phase 4 kind of ran out of time before the big Midwest Meet and believe it or not, here on Saturday, April 20th, 2013 I finally got to finish it!
But wait, "You already had blue LED lights in the trunk...didn't you?" Yes I did. "And I thought you had an accent light on the Alpine Amplifier?" Correct once more! "So, what did you light up? There is nothing left to light back there." I would agree, until I experimented.
Way back when I wired in the accent light for the amp (which was great btw)...did it's job casting a nice, blue light on the ol' Alpine:
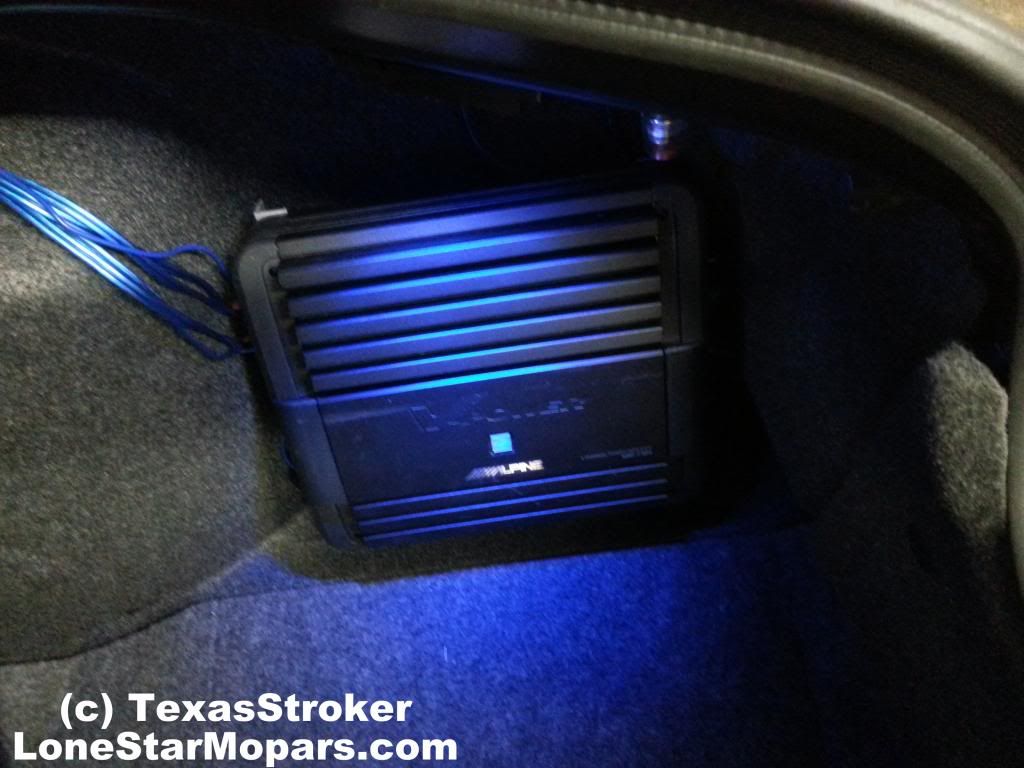
I went ahead and ran some extra wires and pre-terminated them for future expansion...I'll be honest, even though it took me 9 months to take advantage of it, had I not pre-wired things way back last summer, I wouldn't be making this blog post right now...the back of the Challenger would be torn apart and I'd be needing another few hours to wrap things up....
As is, I literally whipped this out in 20 minutes...granted I then spent about 40 on the switch, but a lot of that has to do with the horrible contortion job you have to do to bend over in the trunk...and my insistence on a "dual mode," which we will cover here shortly.
Now, you are still probably wondering what else I could possibly light up...factory center light shines on the Mopar Rear Strut Tower Brace and the Amp is lit up and it seemingly casts a bit more light to help out in the dim trunk...That is correct.
Here is the thing...any custom light, factory light, or ducktaped flashlight really doesn't do a good job illuminating the trunk...These are big cars...the location of the factory light is a limiting factor. You get poor illumination behind the beam angle, and due to the position it is set, the beam doesn't really even do a good job pointing light forward where you would most want it (forward, center). Take a glance left or right and you might be surprised those dark caverns are actually the right and left most reaches of your trunk. Try setting a cell phone down in the trunk, shutting the lid, and popping it to tell a buddy to go find your phone in the trunk...10:1 he will use his phone to call yours after a few minutes of pawing around blindly.
While you can kind of see, it is by no means as good as it could be...and it certainly leaves plenty of room for improvement...and that is what we like to do!
So, enter Phase 4's concept...trace the rim of the trunk with lights and see how it looks.
Here is the thing though...and some folks may be offended. I can't stand seeing a light source. It takes all the trick and custom out of it. I'm in a room with can lights...I look up and see the can, bulb, and light...then spots for looking at it. Think if the ceiling in your office was a pane that looked like a solid ceiling, but emitted light when the switch was on...People would think it was pretty cool right? You bet they would.
I have a picture from the Midwest Meet where a young kid got down on his belly to try and see how the M10 was putting blue light on the pavement. By hiding the light source, things just look better. I know plenty of people that will see this post, run to AutoZone, pick up a 12" stick of LED or Neon and tape it to their trunk liner...while you will have cool lighting, you'll see the source...That bothers me. I see it at shows where guys just plaster LED strips, Neon tubes, and cathodes from the engine bay, to the dash, to the trunk...seeing the light source kills it for me. Sometimes you can't fully hide it, but you can always do better than making it like an old bulb & socket.
I tested things out, and was impressed with what my little 10" test strip lit up (times like these you realize how lackluster factory appointments can be). My issue was I was pretty content with my center and accent light set-up...I was afraid based on the test strip that I was about to light up a small town square. That said, I knew I wanted that look...so I decided to plump a switch in to let me go into "dual mode."
Enacting Phase 4 of Cloud 10
That said, I suppose before we cover that we need to see just what I did...
Step 1: Clean & Prep (Assuming You are Pre-Wired)
First thing first, when you are going to be adhering or mounting anything, always clean and prep the surface...I like to get the dust off with a shop towel and then turn it inside out with a little Prep All (wax and grease remover). If you detail your car and slather on wax, or more likely have traces of Armor All etc on the mounting points, clean it up! If you are going to do something, do it right:

Step 2: Wiring Diagram, Test Fit, Wire-It-Up!
Next up, you need to trace your wiring out and ensure you have enough slack for where you plan to mate the leads and lighting...In my case with the switch you need the following:
-Earth Ground
+Supply Volts
*On Accessory
To break that down you basically need to tie the switch in with the factory ground...Then feed the hot lead to the "Supply Volts," and lastly run the power wire from your light source to the "On Accessory." Most switches have a similar layout...you can usually invert 2 of the positions, just make note of "On" and "Off" if the switch is labeled.
I usually go into great detail on the tech end, but I was in the shop, on limited time, and only had my cell phone handy...Plus, until I go back and see what I mapped out, I would have needed a lot of time to pin down the factory wiring colors given I pre-wired this back last summer.
Since I did the switch, I had to mount it...I picked a really trick location. I debated showing it, but I think I'll keep it low key for now...Can't spill all the secrets...
Step 3: Test Your Work
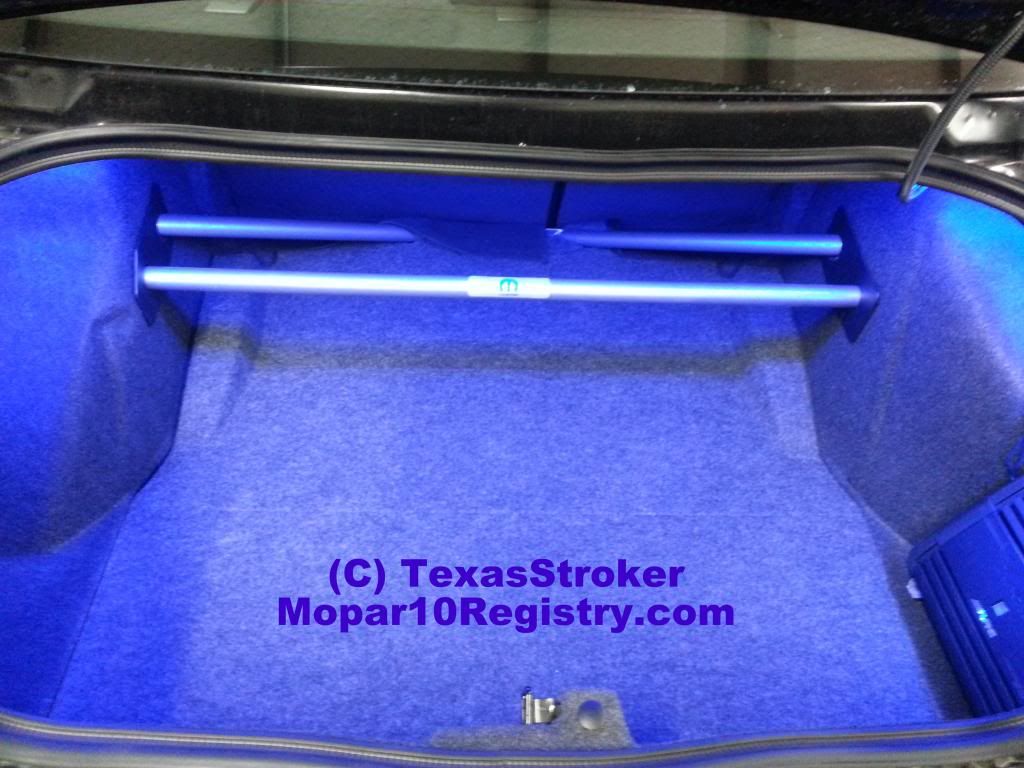
That said, here is what we come out with in the test run (note these pics are with the shop lights on):
Center View, Shop Lights On
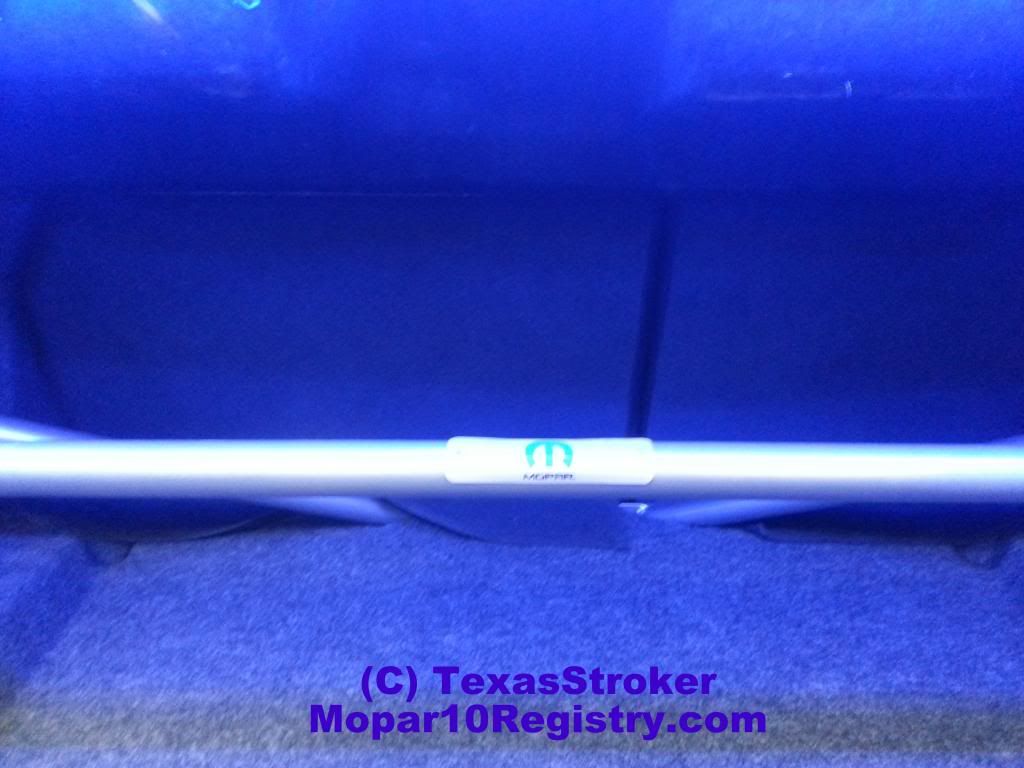
Center View, Close Up, Shop Lights On
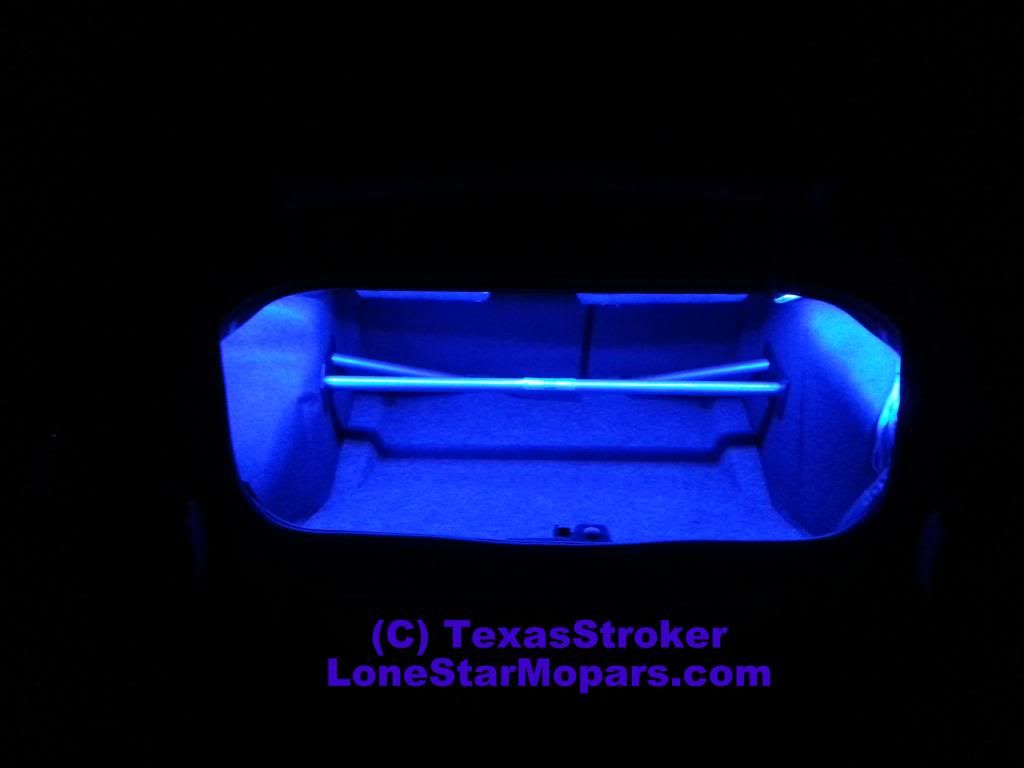
Center View, Shop Lights Out
Center View, Closer-In, Shop Lights Out
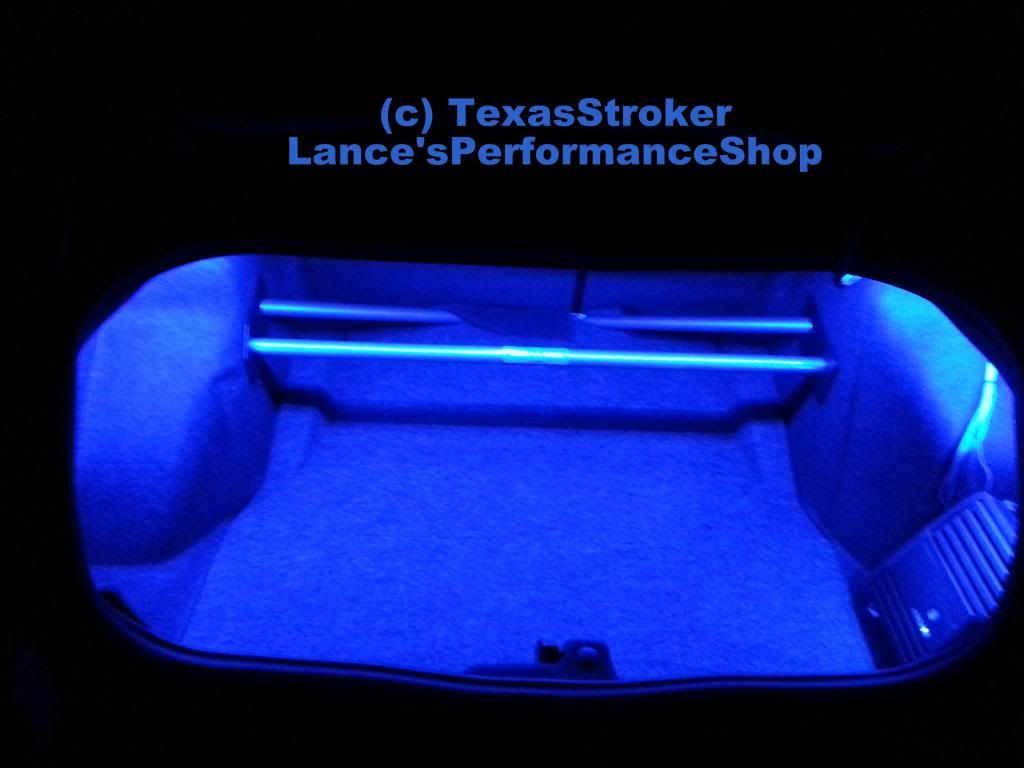
Dual Mode: Subtle Accent Lighting to Full on "Trunk of Blues"
So now, what is that "Dual Mode" I mentioned? Well, it basically means that with the flip of one very well hidden switch I can go from full on House of Blues in the trunk, back to my traditional, and more subtle Blue LED Trunk Light Bulb and Amp Accent Light.
However, now that I have seen the House of Blues in my trunk, I really like it...Basically what that means to you is I wasted 40 minutes of electrical work in a horribly uncomfortable position to wire in a switch I don't really need....That's how life goes.
But, being optimistic and not wanting to fully admit I made a bad decision on the switch, I will likely rotate...In the summer when I run errands I won't have to have the full glow. In the winter months when 7 PM is pitch black, it will come in might handy...and no doubt spark a few more conversations.
Not only does this look AWESOME, it is super functional...you could drop 12 Smurfs in the trunk now and spot them all in no time. The other perk may not seem as obvious...
Increased Functionality and Practicality
Think of when you have the spare tire cover up (if you've never done it...go out to your garage, pop the trunk, turn the lights out, and then lift it up)...see how it blocks almost all of the flipping factory illumination? Not that you'd need it shining on a locked spare or that space saver kit to see things well on the side of the road at night after a flat tire. The good news, if you have any bodies in the trunk and they are on the cab side of the fold in the spare tire cover, that light won't be blocked...they'll be able to see, but you better have a flashlight to get the junk out of the spare tire well...
That alone is peace of mind...I tested it (need to get a pic) and the difference is huge. I can actually see the battery and spare tire (M10's have the actual spare tire, not the kit).
If you are not a fan of the really bright light, just remember, I can go subtle with the flip of a switch!
Conclusion (Cough, The Next Mod, Cough)
Now, talking about future mods, Phase 4 of Cloud 10 has afforded me a new direction...
Where I mounted that light to shine on the amp was okay, but I didn't like that if you were on the LH Side of the trunk, and bent just right you could see the light itself...(for anyone over 6' you'd never see it...). When I'm in full on blue mode in the trunk, I really don't need the accent light in place THERE.
Keyword being "there." I already tested this with my test strip and I think I might be moving the current light from an "above" position, to an "under" position. With a little fab work for a bracket, I can mount the light under and behind the amp...This will give a nice glow not only from under the amp, but in the area behind it as well.
Overall, I am very happy with Phase 4 of Cloud 10. Not only does it look good (and really better than I expected), I gained a lot of practicality in the trunk should I ever have to change tires at night...Plus, simply dropping the key fob into the dark trunk is no longer something to fear (I'm sure many of you can relate to that one). While I was initially worried this might be "too much light," I am now of the mindset it is just right and further accents the blue on black theme of the M10.
When I get around to relocating the amp's accent light I'll make a new post.
Here is one more look at the Phase 4 "Trunk of Blues:"
No comments:
Post a Comment