Showing posts with label TexasStroker. Show all posts
Showing posts with label TexasStroker. Show all posts
Wednesday, September 3, 2014

Wednesday, October 16, 2013
Mopar Top Eliminator 2013: I'm a Finalist and Need Your Vote!
Well, this is a pretty big honor...
My Mopar 10 is one of Ten Finalists for the 2013 Mopar Top Eliminator Program!
The catch is, to win, you have to garner a lot of votes. The contest is run through the Mopar Facebook Page. I am not big on Facebook, and the vast majority of my friends don't even have profiles. A few have said they can vote without being on Facebook, others have to be signed in...
Either way, I would appreciate your support.
My Mopar 10 is "Vehicle #5."
You can vote once every 24 Hours! Please vote and spread the word to your friends. Here is the contest link: http://a.pgtb.me/FfxH6P
Thanks in advance for any support!


My Mopar 10 is one of Ten Finalists for the 2013 Mopar Top Eliminator Program!
The catch is, to win, you have to garner a lot of votes. The contest is run through the Mopar Facebook Page. I am not big on Facebook, and the vast majority of my friends don't even have profiles. A few have said they can vote without being on Facebook, others have to be signed in...
Either way, I would appreciate your support.
My Mopar 10 is "Vehicle #5."
You can vote once every 24 Hours! Please vote and spread the word to your friends. Here is the contest link: http://a.pgtb.me/FfxH6P
Thanks in advance for any support!
Sunday, April 21, 2013
Cloud 10, Phase 4: Blue LED Trunk Lighting
Long time no post...I am still back logged on milestones the M10 has hit and of course, the subtle customizations and performance mods I have made, but those will come in due time.
Cloud 10, Phase 4: Blue LED Trunk Lighting
So, first let me say, that due to things mentioned in the previous post, "Cloud 10" has yet to fully be documented or explained here...I plan on going back and creating new posts to cover that. Here are some basics:
What is Cloud 10?
Cloud 10 is the Project Name I gave to lighting up the M10. You often hear the old adage about being on "Cloud 9" right? Well, Cloud 10 takes that and 1-ups it...in true Mopar fashion.
Since my car has the blue stripe...and black and blue is one of my favorite color combos, I chose to accent the M10's factory appeal with some subtle, custom lighting. Phase 1 was simply swapping over to Blue LED Bulbs. Phase 2 was the sweet Blue LED Footwell Lights. Phase 3, which I had beautifully documented, but put off for other things, was underbody lighting. Phase 4 kind of ran out of time before the big Midwest Meet and believe it or not, here on Saturday, April 20th, 2013 I finally got to finish it!
But wait, "You already had blue LED lights in the trunk...didn't you?" Yes I did. "And I thought you had an accent light on the Alpine Amplifier?" Correct once more! "So, what did you light up? There is nothing left to light back there." I would agree, until I experimented.
Way back when I wired in the accent light for the amp (which was great btw)...did it's job casting a nice, blue light on the ol' Alpine:

I went ahead and ran some extra wires and pre-terminated them for future expansion...I'll be honest, even though it took me 9 months to take advantage of it, had I not pre-wired things way back last summer, I wouldn't be making this blog post right now...the back of the Challenger would be torn apart and I'd be needing another few hours to wrap things up....
As is, I literally whipped this out in 20 minutes...granted I then spent about 40 on the switch, but a lot of that has to do with the horrible contortion job you have to do to bend over in the trunk...and my insistence on a "dual mode," which we will cover here shortly.
Now, you are still probably wondering what else I could possibly light up...factory center light shines on the Mopar Rear Strut Tower Brace and the Amp is lit up and it seemingly casts a bit more light to help out in the dim trunk...That is correct.
Here is the thing...any custom light, factory light, or ducktaped flashlight really doesn't do a good job illuminating the trunk...These are big cars...the location of the factory light is a limiting factor. You get poor illumination behind the beam angle, and due to the position it is set, the beam doesn't really even do a good job pointing light forward where you would most want it (forward, center). Take a glance left or right and you might be surprised those dark caverns are actually the right and left most reaches of your trunk. Try setting a cell phone down in the trunk, shutting the lid, and popping it to tell a buddy to go find your phone in the trunk...10:1 he will use his phone to call yours after a few minutes of pawing around blindly.
While you can kind of see, it is by no means as good as it could be...and it certainly leaves plenty of room for improvement...and that is what we like to do!
So, enter Phase 4's concept...trace the rim of the trunk with lights and see how it looks.
Here is the thing though...and some folks may be offended. I can't stand seeing a light source. It takes all the trick and custom out of it. I'm in a room with can lights...I look up and see the can, bulb, and light...then spots for looking at it. Think if the ceiling in your office was a pane that looked like a solid ceiling, but emitted light when the switch was on...People would think it was pretty cool right? You bet they would.
I have a picture from the Midwest Meet where a young kid got down on his belly to try and see how the M10 was putting blue light on the pavement. By hiding the light source, things just look better. I know plenty of people that will see this post, run to AutoZone, pick up a 12" stick of LED or Neon and tape it to their trunk liner...while you will have cool lighting, you'll see the source...That bothers me. I see it at shows where guys just plaster LED strips, Neon tubes, and cathodes from the engine bay, to the dash, to the trunk...seeing the light source kills it for me. Sometimes you can't fully hide it, but you can always do better than making it like an old bulb & socket.
I tested things out, and was impressed with what my little 10" test strip lit up (times like these you realize how lackluster factory appointments can be). My issue was I was pretty content with my center and accent light set-up...I was afraid based on the test strip that I was about to light up a small town square. That said, I knew I wanted that look...so I decided to plump a switch in to let me go into "dual mode."
Enacting Phase 4 of Cloud 10
That said, I suppose before we cover that we need to see just what I did...
Step 1: Clean & Prep (Assuming You are Pre-Wired)
First thing first, when you are going to be adhering or mounting anything, always clean and prep the surface...I like to get the dust off with a shop towel and then turn it inside out with a little Prep All (wax and grease remover). If you detail your car and slather on wax, or more likely have traces of Armor All etc on the mounting points, clean it up! If you are going to do something, do it right:

Step 2: Wiring Diagram, Test Fit, Wire-It-Up!
Next up, you need to trace your wiring out and ensure you have enough slack for where you plan to mate the leads and lighting...In my case with the switch you need the following:
-Earth Ground
+Supply Volts
*On Accessory
To break that down you basically need to tie the switch in with the factory ground...Then feed the hot lead to the "Supply Volts," and lastly run the power wire from your light source to the "On Accessory." Most switches have a similar layout...you can usually invert 2 of the positions, just make note of "On" and "Off" if the switch is labeled.
I usually go into great detail on the tech end, but I was in the shop, on limited time, and only had my cell phone handy...Plus, until I go back and see what I mapped out, I would have needed a lot of time to pin down the factory wiring colors given I pre-wired this back last summer.
Since I did the switch, I had to mount it...I picked a really trick location. I debated showing it, but I think I'll keep it low key for now...Can't spill all the secrets...
Step 3: Test Your Work
That said, here is what we come out with in the test run (note these pics are with the shop lights on):


Step 4: Enjoy It! Or Post It Up!
Dual Mode: Subtle Accent Lighting to Full on "Trunk of Blues"
So now, what is that "Dual Mode" I mentioned? Well, it basically means that with the flip of one very well hidden switch I can go from full on House of Blues in the trunk, back to my traditional, and more subtle Blue LED Trunk Light Bulb and Amp Accent Light.
However, now that I have seen the House of Blues in my trunk, I really like it...Basically what that means to you is I wasted 40 minutes of electrical work in a horribly uncomfortable position to wire in a switch I don't really need....That's how life goes.
But, being optimistic and not wanting to fully admit I made a bad decision on the switch, I will likely rotate...In the summer when I run errands I won't have to have the full glow. In the winter months when 7 PM is pitch black, it will come in might handy...and no doubt spark a few more conversations.
Not only does this look AWESOME, it is super functional...you could drop 12 Smurfs in the trunk now and spot them all in no time. The other perk may not seem as obvious...
Increased Functionality and Practicality
Think of when you have the spare tire cover up (if you've never done it...go out to your garage, pop the trunk, turn the lights out, and then lift it up)...see how it blocks almost all of the flipping factory illumination? Not that you'd need it shining on a locked spare or that space saver kit to see things well on the side of the road at night after a flat tire. The good news, if you have any bodies in the trunk and they are on the cab side of the fold in the spare tire cover, that light won't be blocked...they'll be able to see, but you better have a flashlight to get the junk out of the spare tire well...
That alone is peace of mind...I tested it (need to get a pic) and the difference is huge. I can actually see the battery and spare tire (M10's have the actual spare tire, not the kit).
If you are not a fan of the really bright light, just remember, I can go subtle with the flip of a switch!
Conclusion (Cough, The Next Mod, Cough)
Now, talking about future mods, Phase 4 of Cloud 10 has afforded me a new direction...
Where I mounted that light to shine on the amp was okay, but I didn't like that if you were on the LH Side of the trunk, and bent just right you could see the light itself...(for anyone over 6' you'd never see it...). When I'm in full on blue mode in the trunk, I really don't need the accent light in place THERE.
Keyword being "there." I already tested this with my test strip and I think I might be moving the current light from an "above" position, to an "under" position. With a little fab work for a bracket, I can mount the light under and behind the amp...This will give a nice glow not only from under the amp, but in the area behind it as well.
Overall, I am very happy with Phase 4 of Cloud 10. Not only does it look good (and really better than I expected), I gained a lot of practicality in the trunk should I ever have to change tires at night...Plus, simply dropping the key fob into the dark trunk is no longer something to fear (I'm sure many of you can relate to that one). While I was initially worried this might be "too much light," I am now of the mindset it is just right and further accents the blue on black theme of the M10.
When I get around to relocating the amp's accent light I'll make a new post.
Here is one more look at the Phase 4 "Trunk of Blues:"
Cloud 10, Phase 4: Blue LED Trunk Lighting
So, first let me say, that due to things mentioned in the previous post, "Cloud 10" has yet to fully be documented or explained here...I plan on going back and creating new posts to cover that. Here are some basics:
What is Cloud 10?
Cloud 10 is the Project Name I gave to lighting up the M10. You often hear the old adage about being on "Cloud 9" right? Well, Cloud 10 takes that and 1-ups it...in true Mopar fashion.
Since my car has the blue stripe...and black and blue is one of my favorite color combos, I chose to accent the M10's factory appeal with some subtle, custom lighting. Phase 1 was simply swapping over to Blue LED Bulbs. Phase 2 was the sweet Blue LED Footwell Lights. Phase 3, which I had beautifully documented, but put off for other things, was underbody lighting. Phase 4 kind of ran out of time before the big Midwest Meet and believe it or not, here on Saturday, April 20th, 2013 I finally got to finish it!
But wait, "You already had blue LED lights in the trunk...didn't you?" Yes I did. "And I thought you had an accent light on the Alpine Amplifier?" Correct once more! "So, what did you light up? There is nothing left to light back there." I would agree, until I experimented.
Way back when I wired in the accent light for the amp (which was great btw)...did it's job casting a nice, blue light on the ol' Alpine:
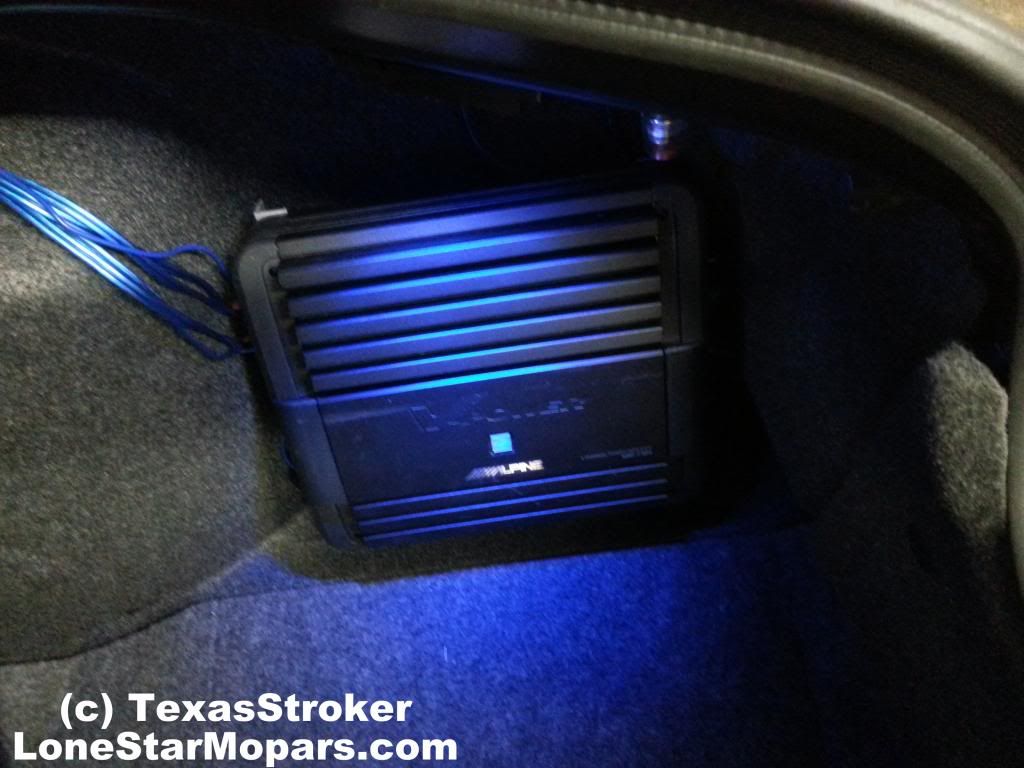
I went ahead and ran some extra wires and pre-terminated them for future expansion...I'll be honest, even though it took me 9 months to take advantage of it, had I not pre-wired things way back last summer, I wouldn't be making this blog post right now...the back of the Challenger would be torn apart and I'd be needing another few hours to wrap things up....
As is, I literally whipped this out in 20 minutes...granted I then spent about 40 on the switch, but a lot of that has to do with the horrible contortion job you have to do to bend over in the trunk...and my insistence on a "dual mode," which we will cover here shortly.
Now, you are still probably wondering what else I could possibly light up...factory center light shines on the Mopar Rear Strut Tower Brace and the Amp is lit up and it seemingly casts a bit more light to help out in the dim trunk...That is correct.
Here is the thing...any custom light, factory light, or ducktaped flashlight really doesn't do a good job illuminating the trunk...These are big cars...the location of the factory light is a limiting factor. You get poor illumination behind the beam angle, and due to the position it is set, the beam doesn't really even do a good job pointing light forward where you would most want it (forward, center). Take a glance left or right and you might be surprised those dark caverns are actually the right and left most reaches of your trunk. Try setting a cell phone down in the trunk, shutting the lid, and popping it to tell a buddy to go find your phone in the trunk...10:1 he will use his phone to call yours after a few minutes of pawing around blindly.
While you can kind of see, it is by no means as good as it could be...and it certainly leaves plenty of room for improvement...and that is what we like to do!
So, enter Phase 4's concept...trace the rim of the trunk with lights and see how it looks.
Here is the thing though...and some folks may be offended. I can't stand seeing a light source. It takes all the trick and custom out of it. I'm in a room with can lights...I look up and see the can, bulb, and light...then spots for looking at it. Think if the ceiling in your office was a pane that looked like a solid ceiling, but emitted light when the switch was on...People would think it was pretty cool right? You bet they would.
I have a picture from the Midwest Meet where a young kid got down on his belly to try and see how the M10 was putting blue light on the pavement. By hiding the light source, things just look better. I know plenty of people that will see this post, run to AutoZone, pick up a 12" stick of LED or Neon and tape it to their trunk liner...while you will have cool lighting, you'll see the source...That bothers me. I see it at shows where guys just plaster LED strips, Neon tubes, and cathodes from the engine bay, to the dash, to the trunk...seeing the light source kills it for me. Sometimes you can't fully hide it, but you can always do better than making it like an old bulb & socket.
I tested things out, and was impressed with what my little 10" test strip lit up (times like these you realize how lackluster factory appointments can be). My issue was I was pretty content with my center and accent light set-up...I was afraid based on the test strip that I was about to light up a small town square. That said, I knew I wanted that look...so I decided to plump a switch in to let me go into "dual mode."
Enacting Phase 4 of Cloud 10
That said, I suppose before we cover that we need to see just what I did...
Step 1: Clean & Prep (Assuming You are Pre-Wired)
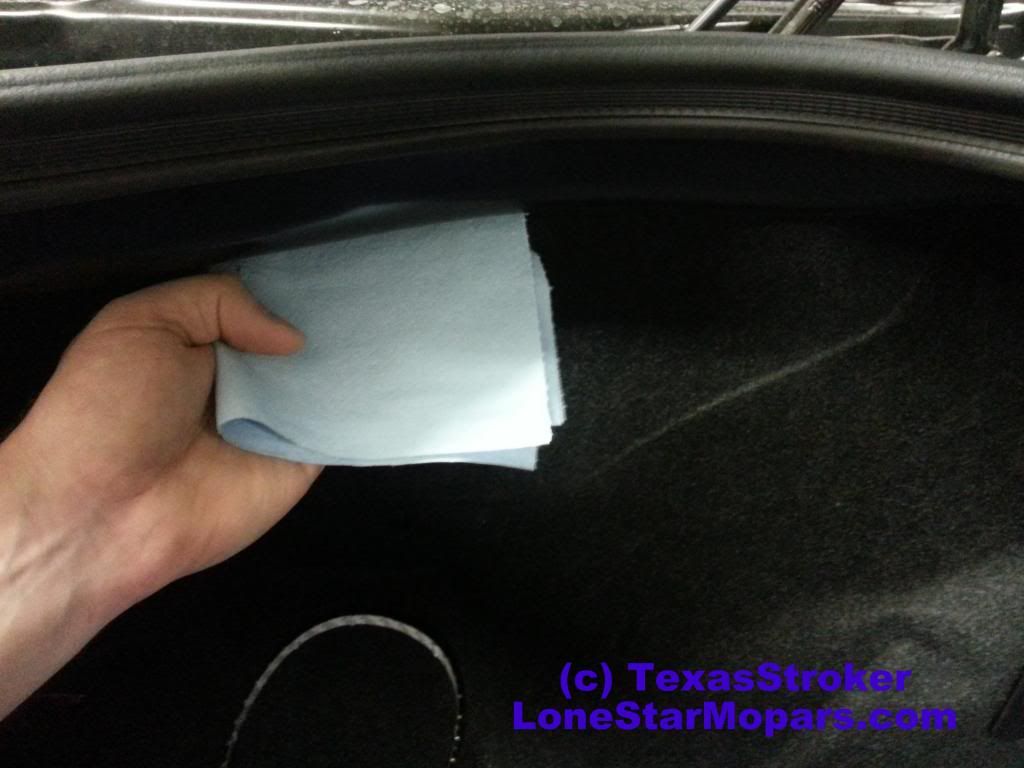
First thing first, when you are going to be adhering or mounting anything, always clean and prep the surface...I like to get the dust off with a shop towel and then turn it inside out with a little Prep All (wax and grease remover). If you detail your car and slather on wax, or more likely have traces of Armor All etc on the mounting points, clean it up! If you are going to do something, do it right:
Step 2: Wiring Diagram, Test Fit, Wire-It-Up!
Next up, you need to trace your wiring out and ensure you have enough slack for where you plan to mate the leads and lighting...In my case with the switch you need the following:
-Earth Ground
+Supply Volts
*On Accessory
To break that down you basically need to tie the switch in with the factory ground...Then feed the hot lead to the "Supply Volts," and lastly run the power wire from your light source to the "On Accessory." Most switches have a similar layout...you can usually invert 2 of the positions, just make note of "On" and "Off" if the switch is labeled.
I usually go into great detail on the tech end, but I was in the shop, on limited time, and only had my cell phone handy...Plus, until I go back and see what I mapped out, I would have needed a lot of time to pin down the factory wiring colors given I pre-wired this back last summer.
Since I did the switch, I had to mount it...I picked a really trick location. I debated showing it, but I think I'll keep it low key for now...Can't spill all the secrets...
Step 3: Test Your Work
That said, here is what we come out with in the test run (note these pics are with the shop lights on):
Center View, Shop Lights On
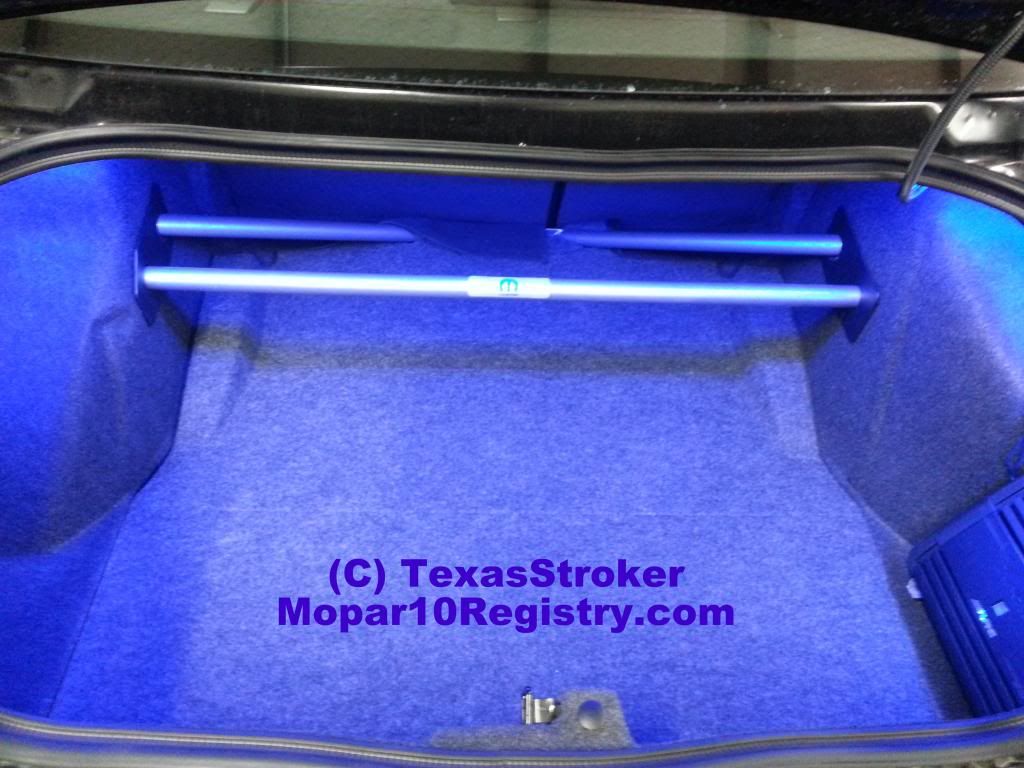
Center View, Close Up, Shop Lights On
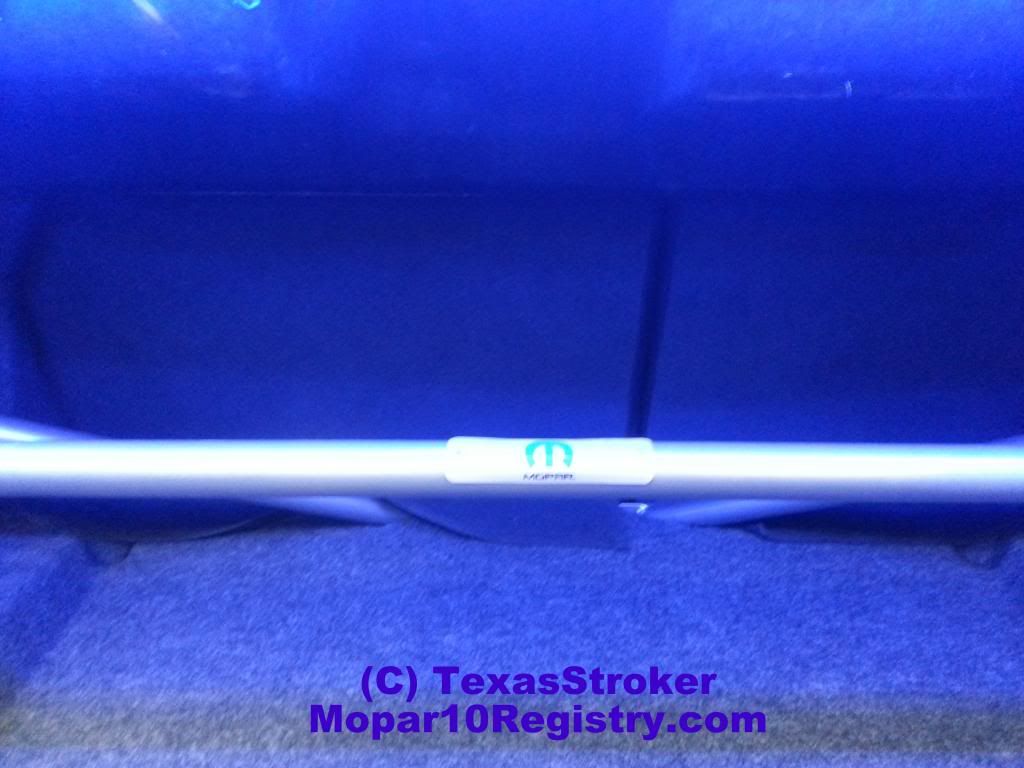
Center View, Shop Lights Out
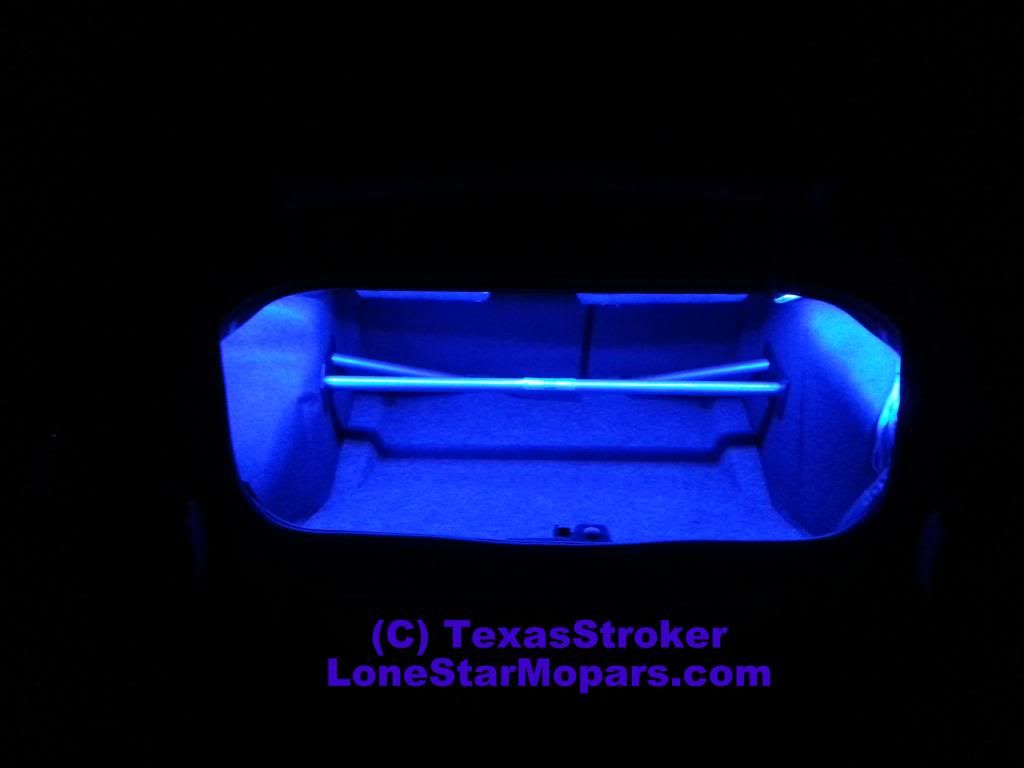
Center View, Closer-In, Shop Lights Out
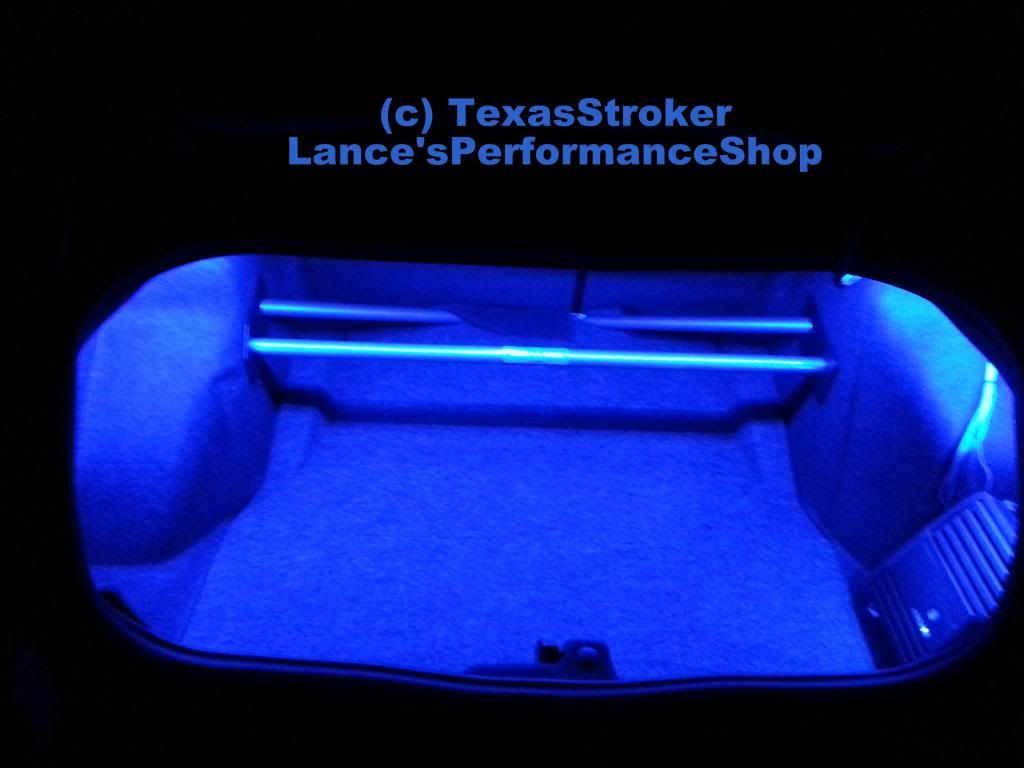
Dual Mode: Subtle Accent Lighting to Full on "Trunk of Blues"
So now, what is that "Dual Mode" I mentioned? Well, it basically means that with the flip of one very well hidden switch I can go from full on House of Blues in the trunk, back to my traditional, and more subtle Blue LED Trunk Light Bulb and Amp Accent Light.
However, now that I have seen the House of Blues in my trunk, I really like it...Basically what that means to you is I wasted 40 minutes of electrical work in a horribly uncomfortable position to wire in a switch I don't really need....That's how life goes.
But, being optimistic and not wanting to fully admit I made a bad decision on the switch, I will likely rotate...In the summer when I run errands I won't have to have the full glow. In the winter months when 7 PM is pitch black, it will come in might handy...and no doubt spark a few more conversations.
Not only does this look AWESOME, it is super functional...you could drop 12 Smurfs in the trunk now and spot them all in no time. The other perk may not seem as obvious...
Increased Functionality and Practicality
Think of when you have the spare tire cover up (if you've never done it...go out to your garage, pop the trunk, turn the lights out, and then lift it up)...see how it blocks almost all of the flipping factory illumination? Not that you'd need it shining on a locked spare or that space saver kit to see things well on the side of the road at night after a flat tire. The good news, if you have any bodies in the trunk and they are on the cab side of the fold in the spare tire cover, that light won't be blocked...they'll be able to see, but you better have a flashlight to get the junk out of the spare tire well...
That alone is peace of mind...I tested it (need to get a pic) and the difference is huge. I can actually see the battery and spare tire (M10's have the actual spare tire, not the kit).
If you are not a fan of the really bright light, just remember, I can go subtle with the flip of a switch!
Conclusion (Cough, The Next Mod, Cough)
Now, talking about future mods, Phase 4 of Cloud 10 has afforded me a new direction...
Where I mounted that light to shine on the amp was okay, but I didn't like that if you were on the LH Side of the trunk, and bent just right you could see the light itself...(for anyone over 6' you'd never see it...). When I'm in full on blue mode in the trunk, I really don't need the accent light in place THERE.
Keyword being "there." I already tested this with my test strip and I think I might be moving the current light from an "above" position, to an "under" position. With a little fab work for a bracket, I can mount the light under and behind the amp...This will give a nice glow not only from under the amp, but in the area behind it as well.
Overall, I am very happy with Phase 4 of Cloud 10. Not only does it look good (and really better than I expected), I gained a lot of practicality in the trunk should I ever have to change tires at night...Plus, simply dropping the key fob into the dark trunk is no longer something to fear (I'm sure many of you can relate to that one). While I was initially worried this might be "too much light," I am now of the mindset it is just right and further accents the blue on black theme of the M10.
When I get around to relocating the amp's accent light I'll make a new post.
Here is one more look at the Phase 4 "Trunk of Blues:"
Wednesday, October 3, 2012
Dual AeroForce Interceptor Scan Gauges
If you read the post on the Razor's Edge Motorsports Dual A-Pillar Gauge Pod install, you probably knew what was coming...at least to an extent. The correct answer is Dual AeroForce Interceptors!
You might recall how I have long complained of not having an Oil Pressure Gauge and how the Mopar 10s didn't come from the factory with EVIC, which would have been great for everyone to not only monitor vitals, but also have some fun performance wise.
I learned of the AeroForce Interceptor before I ever had the Mopar 10 and thought they were pretty cool. When I wound up with the M10 and began looking to make up for not having EVIC, I decided to go the route of an Interceptor.
As I checked around to see if anyone had one and how they liked it I learned that no one in my circle of "Challenger" friends had them. I couldn't figure it out. I finally got word that the guys doing aftermarket gauges were usually doing doubles or triples with the old school approach: Oil, Water, and Volts via electric senders. A few opted for Oil and Volts sufficing that the factory "C-H" temp gauge would do.
I checked around and they were all running adapters for the Oil Pressure Gauge. I couldn't believe that the factory cranked out the same car with and without EVIC and that the wiring wasn't there to support oil pressure on non-EVIC cars. Then again, I was told I couldn't swap a "stock cluster" for an "EVIC cluster" without basically rewiring the car (fly a tech in from Detroit and be without the car a few days), so I assumed it must have just been done that way.
A tech heavy source told me that the LX guys ran Interceptors on the 05-07s, but that the 2008+ cars wouldn't spit out oil pressure...bummer.
The way I do things, and how things use to largely be done was simple. The wiring for all the bells and whistles is there: top of the line radio, fog lights, heated seats, sirius etc. If it was an expensive piece, you just left the main run with the appropriate connector and had the consumer pick up the "harness." Simple. Clearly, things have changed.
I was sad to say goodbye to the prospects of the Interceptor, but always hopeful that some other option would come along.
When DiabloSport launched the Trinity I just knew I had found my work around. One single unit to tune, monitor performance, log data, and display PIDs on a custom gauge layout. I shot them an e-mail shortly after launch. They said nope, no oil pressure for a non-EVIC car.
I had a hard time believing we had an oil pressure warning light, but no way to either tap into or read the ECU for the actual pressure...how else does the warning light work?
Then, about a year ago DiabloSport launched the inTune. Sweet! New technology and with data logging touted as one if the inTune's main features I just knew it was the answer. Wrong. I shot an e-mail, several actually, and got the same line as I did with the Trinity. The inTune would not read oil pressure in a non-EVIC car.
I should mention I tried Superchips VIVID when I was also in the market for navigation...Tune, Gauges, Navigation, Android...same thing, no oil pressure.
As fate would have it, a friend informed me that his tech buddy had learned you could simply splice into the signal wire from the warning light and it would also read out pressure on a gauge. That was about where I decided to just go that route. Hard to justify spending the cash for a single oil pressure gauge, a volt gauge, and a water temp gauge when I'd still not have the other features I wanted.
I began (once again) scouring the net for info. The late model Mopar forums (which I just "love" (sarcasm there folks)), had a few threads on this exact issue, but guess what? The question either went unanswered, or the folks that might have been able to provide the solution were banned....Fantastic!
As a last ditch effort, I tried LX Forums hoping some "banned" or open minded LC owners might have migrated over there for the wealth of information. I found a thread just a day or two old with someone asking the same question...he got an answer of "Yes...it will read oil pressure!" Only issue? It was from 07 and back cars and owners. I chimed in, but no one with an 08+ seemed to see the thread.
Between mindslayer and Jim things looked great on the 07 back side of the table. I wanted to get the M10 upgraded for CIC IV and knew the gauges would look great and give me tons of features, even without oil pressure.
I had decided to spring for the gauges and simply wire in Oil Pressure as an analog input on one of the Interceptors. Before doing so I shot some tech questions in to AeroForce. Todd said that he was confident oil pressure would read out on my car, but added he had never had confirmation and didn't have a car to test.
He then went out-of-the-way with an offer I could return the gauges if Oil Pressure didn't read...hard to pass that up.
Thanks to super quick shipping I had my inTune in the weekend before the gauges. I decided to try it out by logging the stock tune and then installing a tune. When I reviewed the file I saw no oil pressure parameter.
When I was leaving work Monday I decided to log again with the inTune. This time I decided to see what all I could log. I skimmed the whole list and never saw oil pressure. Then I decided to check the "Add PID" just for the heck of it. I went to Engine and there was Oil Pressure.
I figured DiabloSport just had it there since it was a parameter that didn't read on this application...I added it and made the log. I got home, pulled up the file, and voila...oil pressure! How did DiaboSport not know this?? My other thought was more important...I figured if the inTune would read Oil Pressure, so would the Interceptor.
Before I even installed the Interceptors, I plugged one in to the OBD port and set it up...I saw Oil Pressure, but knew to temper expectations. Upon firing the car up, there was my steady stream of 56-59 PSI. Once warmed up, the car dropped back down just as it should. I put it in gear and it dropped again. Cycled to Park and gave it some gas...the PSI fluctuated just as it should...I was ecstatic!
It turns out everyone was wrong. There is a ton of misinformation out there not only on forums and among enthusiasts, but among the speed shops, dealers, and factory techs with a performance mind.
I can say definitively that the AeroForce Interceptor (and inTune for that matter) will read Oil Pressure on a non-EVIC car later than 2008. Was the 08 and 09 ECU different, I seriously doubt it. But my 2010 sure as heck has it on board ready to view and I love it.
After 21 months of wanting to monitor Oil Pressure I am finally doing it...and doing it with style!
In addition to Oil Pressure the Dual Interceptors give me pretty much any parameter I would ever want to monitor or simply check from time-to-time. It is incredible!
I basically got the Mopar 10 all the same features as EVIC but for a fraction of the price and in a more user friendly and custom package.
Not only does the Interceptor monitor the basics (Oil Pressure, Water Temp., Volts, Trans. Temp, Oil Temp, etc) you have access to Intake Air Temp., Command Air Fuel, Short Term and Long Term Fuel Trims, Injector Duty Cycle, Ignition Advance, Knock, MDS Status, Current Gear, and a huge list of other elements.
But that's not all! With 2 Analog Inputs on each gauge you have the option of adding 4 more readouts, particularly things like Wideband Air Fuel Ratio or EGT if you go with a Turbo set-up etc.
However, there is still more. Say you want a warning light to come on sooner than the factory...well, with the annunciator you can do that. Oil Pressure below 25...Temp above 225...AFR below 12.5 with x pct throttle etc...it can all be set-up.
Oh and the gauges will read and clear DTCs. Plus say you installed Long Tubes and eliminated the cats...you got your custom tune, but the code is still tripping, record it and clear it! Similarly, if you decide to drop from your R/Ts 20" rims down to an 18" for the track or full time use you can adjust it via the Interceptor...same for changing rear end gears.
Speaking of custom tunes, did you know the Interceptor will record 60 seconds of run time for you to review? Yep, full on-board data logging!
But, perhaps most important for non-EVIC cars is that we get the Performance Functions of EVIC! Horsepower and Torque will both read out on the gauges! The Performance Menu actually logs your 0-60, 1/8, and 1/4 mile times and mph! This is like having the best features of the Trinity without the bulk!
The AeroForce Interceptor is truly a wonder for late model Mopars. The only thing I'm mad about is all the misinformation and the resultant time it took from when I wanted the gauges and when I got them. The peace of mind alone is worth the asking price, but factor in all the parameters you can monitor, the 2 Analog Inputs, ability to read and clear DTCs, bi-directional controls, data logging capabilities, and the Performance functions and you've got one heck of a piece in your car.
Installed in the Razor's Edge Gauge Pod they look right at home in the M10. The blue background really suits the car and I should also mention the custom splash screens, gauge faces, and bezels. You can truly customize your Interceptor and make it just right for your Mopar.
Here are some more pictures and videos:
COMING SOON!
You might recall how I have long complained of not having an Oil Pressure Gauge and how the Mopar 10s didn't come from the factory with EVIC, which would have been great for everyone to not only monitor vitals, but also have some fun performance wise.
I learned of the AeroForce Interceptor before I ever had the Mopar 10 and thought they were pretty cool. When I wound up with the M10 and began looking to make up for not having EVIC, I decided to go the route of an Interceptor.
As I checked around to see if anyone had one and how they liked it I learned that no one in my circle of "Challenger" friends had them. I couldn't figure it out. I finally got word that the guys doing aftermarket gauges were usually doing doubles or triples with the old school approach: Oil, Water, and Volts via electric senders. A few opted for Oil and Volts sufficing that the factory "C-H" temp gauge would do.
I checked around and they were all running adapters for the Oil Pressure Gauge. I couldn't believe that the factory cranked out the same car with and without EVIC and that the wiring wasn't there to support oil pressure on non-EVIC cars. Then again, I was told I couldn't swap a "stock cluster" for an "EVIC cluster" without basically rewiring the car (fly a tech in from Detroit and be without the car a few days), so I assumed it must have just been done that way.
A tech heavy source told me that the LX guys ran Interceptors on the 05-07s, but that the 2008+ cars wouldn't spit out oil pressure...bummer.
The way I do things, and how things use to largely be done was simple. The wiring for all the bells and whistles is there: top of the line radio, fog lights, heated seats, sirius etc. If it was an expensive piece, you just left the main run with the appropriate connector and had the consumer pick up the "harness." Simple. Clearly, things have changed.
I was sad to say goodbye to the prospects of the Interceptor, but always hopeful that some other option would come along.
When DiabloSport launched the Trinity I just knew I had found my work around. One single unit to tune, monitor performance, log data, and display PIDs on a custom gauge layout. I shot them an e-mail shortly after launch. They said nope, no oil pressure for a non-EVIC car.
I had a hard time believing we had an oil pressure warning light, but no way to either tap into or read the ECU for the actual pressure...how else does the warning light work?
Then, about a year ago DiabloSport launched the inTune. Sweet! New technology and with data logging touted as one if the inTune's main features I just knew it was the answer. Wrong. I shot an e-mail, several actually, and got the same line as I did with the Trinity. The inTune would not read oil pressure in a non-EVIC car.
I should mention I tried Superchips VIVID when I was also in the market for navigation...Tune, Gauges, Navigation, Android...same thing, no oil pressure.
As fate would have it, a friend informed me that his tech buddy had learned you could simply splice into the signal wire from the warning light and it would also read out pressure on a gauge. That was about where I decided to just go that route. Hard to justify spending the cash for a single oil pressure gauge, a volt gauge, and a water temp gauge when I'd still not have the other features I wanted.
I began (once again) scouring the net for info. The late model Mopar forums (which I just "love" (sarcasm there folks)), had a few threads on this exact issue, but guess what? The question either went unanswered, or the folks that might have been able to provide the solution were banned....Fantastic!
As a last ditch effort, I tried LX Forums hoping some "banned" or open minded LC owners might have migrated over there for the wealth of information. I found a thread just a day or two old with someone asking the same question...he got an answer of "Yes...it will read oil pressure!" Only issue? It was from 07 and back cars and owners. I chimed in, but no one with an 08+ seemed to see the thread.
Between mindslayer and Jim things looked great on the 07 back side of the table. I wanted to get the M10 upgraded for CIC IV and knew the gauges would look great and give me tons of features, even without oil pressure.
I had decided to spring for the gauges and simply wire in Oil Pressure as an analog input on one of the Interceptors. Before doing so I shot some tech questions in to AeroForce. Todd said that he was confident oil pressure would read out on my car, but added he had never had confirmation and didn't have a car to test.
He then went out-of-the-way with an offer I could return the gauges if Oil Pressure didn't read...hard to pass that up.
Thanks to super quick shipping I had my inTune in the weekend before the gauges. I decided to try it out by logging the stock tune and then installing a tune. When I reviewed the file I saw no oil pressure parameter.
When I was leaving work Monday I decided to log again with the inTune. This time I decided to see what all I could log. I skimmed the whole list and never saw oil pressure. Then I decided to check the "Add PID" just for the heck of it. I went to Engine and there was Oil Pressure.
I figured DiabloSport just had it there since it was a parameter that didn't read on this application...I added it and made the log. I got home, pulled up the file, and voila...oil pressure! How did DiaboSport not know this?? My other thought was more important...I figured if the inTune would read Oil Pressure, so would the Interceptor.
Before I even installed the Interceptors, I plugged one in to the OBD port and set it up...I saw Oil Pressure, but knew to temper expectations. Upon firing the car up, there was my steady stream of 56-59 PSI. Once warmed up, the car dropped back down just as it should. I put it in gear and it dropped again. Cycled to Park and gave it some gas...the PSI fluctuated just as it should...I was ecstatic!
It turns out everyone was wrong. There is a ton of misinformation out there not only on forums and among enthusiasts, but among the speed shops, dealers, and factory techs with a performance mind.
I can say definitively that the AeroForce Interceptor (and inTune for that matter) will read Oil Pressure on a non-EVIC car later than 2008. Was the 08 and 09 ECU different, I seriously doubt it. But my 2010 sure as heck has it on board ready to view and I love it.
After 21 months of wanting to monitor Oil Pressure I am finally doing it...and doing it with style!
In addition to Oil Pressure the Dual Interceptors give me pretty much any parameter I would ever want to monitor or simply check from time-to-time. It is incredible!
I basically got the Mopar 10 all the same features as EVIC but for a fraction of the price and in a more user friendly and custom package.
Not only does the Interceptor monitor the basics (Oil Pressure, Water Temp., Volts, Trans. Temp, Oil Temp, etc) you have access to Intake Air Temp., Command Air Fuel, Short Term and Long Term Fuel Trims, Injector Duty Cycle, Ignition Advance, Knock, MDS Status, Current Gear, and a huge list of other elements.
But that's not all! With 2 Analog Inputs on each gauge you have the option of adding 4 more readouts, particularly things like Wideband Air Fuel Ratio or EGT if you go with a Turbo set-up etc.
However, there is still more. Say you want a warning light to come on sooner than the factory...well, with the annunciator you can do that. Oil Pressure below 25...Temp above 225...AFR below 12.5 with x pct throttle etc...it can all be set-up.
Oh and the gauges will read and clear DTCs. Plus say you installed Long Tubes and eliminated the cats...you got your custom tune, but the code is still tripping, record it and clear it! Similarly, if you decide to drop from your R/Ts 20" rims down to an 18" for the track or full time use you can adjust it via the Interceptor...same for changing rear end gears.
Speaking of custom tunes, did you know the Interceptor will record 60 seconds of run time for you to review? Yep, full on-board data logging!
But, perhaps most important for non-EVIC cars is that we get the Performance Functions of EVIC! Horsepower and Torque will both read out on the gauges! The Performance Menu actually logs your 0-60, 1/8, and 1/4 mile times and mph! This is like having the best features of the Trinity without the bulk!
The AeroForce Interceptor is truly a wonder for late model Mopars. The only thing I'm mad about is all the misinformation and the resultant time it took from when I wanted the gauges and when I got them. The peace of mind alone is worth the asking price, but factor in all the parameters you can monitor, the 2 Analog Inputs, ability to read and clear DTCs, bi-directional controls, data logging capabilities, and the Performance functions and you've got one heck of a piece in your car.
Installed in the Razor's Edge Gauge Pod they look right at home in the M10. The blue background really suits the car and I should also mention the custom splash screens, gauge faces, and bezels. You can truly customize your Interceptor and make it just right for your Mopar.
Here are some more pictures and videos:
COMING SOON!
Wednesday, September 19, 2012
More for the M10!
Well, despite not getting to fully "catch up" on recapping some of the recent upgrades to the M10, I finally got the time to pull the trigger on some stuff I've wanted to add for a LONG time.
I got most of the parts ordered late Monday, September 17th, 2012 and the last few pieces very early Tuesday morning. If not for "online" store fronts, I don't know if I'd have ever gotten the stuff ordered.
The parts ordered in this time are definitely more performance oriented than what I've done up to this point.
That should give you a fairly good idea of what is likely coming...I won't go into it in full until the parts are on and the install is documented, but let's just say the car should "wake up" a bit, have a bark to it, and speak more to me.
If you can make sense of that, post up in a reply. I'l mention you in one of the write-ups!
Thanks to various shipping locations, I will actually get the first part in tomorrow afternoon (barring a massive UPS failure). Most everything else is currently slated for Monday, September 24th, 2012 and the stuff I ordered early Tuesday (9/18) should arrive in the afternoon on Tuesday, September 25th, 2012.
I'm pretty excited about it.
Naturally what I planned to install first, will be here the latest, but oh well. I can go right to work with what comes in tomorrow. Might even have some info on that this weekend!
I got most of the parts ordered late Monday, September 17th, 2012 and the last few pieces very early Tuesday morning. If not for "online" store fronts, I don't know if I'd have ever gotten the stuff ordered.
The parts ordered in this time are definitely more performance oriented than what I've done up to this point.
That should give you a fairly good idea of what is likely coming...I won't go into it in full until the parts are on and the install is documented, but let's just say the car should "wake up" a bit, have a bark to it, and speak more to me.
If you can make sense of that, post up in a reply. I'l mention you in one of the write-ups!
Thanks to various shipping locations, I will actually get the first part in tomorrow afternoon (barring a massive UPS failure). Most everything else is currently slated for Monday, September 24th, 2012 and the stuff I ordered early Tuesday (9/18) should arrive in the afternoon on Tuesday, September 25th, 2012.
I'm pretty excited about it.
Naturally what I planned to install first, will be here the latest, but oh well. I can go right to work with what comes in tomorrow. Might even have some info on that this weekend!
Monday, September 10, 2012
Mopar 10 with the 2012 SRT Tour
Amarillo Area Mopars was fortunate enough to be slated as one of the stops on the 2012 SRT Tour. We caught Monday, September 10th, 2012 6 PM on the tour schedule and as fate would have it had a very nice day, minus the typical wind. I opted to take the Mopar 10, which is why you are reading this...Scroll all the way down for some bonus M10 stuff.
Aerial Group Shot:

Video:
The 2012 SRT Tour is a cross country trip put on by the folks at SRT to showcase the 2012 line-up of, you guessed it, SRT vehicles. The Tour features the 300C, Jeep Grand Cherokee, Charger, and Challenger. Four drivers: Jennifer, John, Rachel, and Sean were given the daunting (cough, sarcasm, cough) task of piloting these factory fresh SRTs across the great American landscape and show them off to enthusiasts and garner attention of would be converts from brand-x platforms, or as I like to call them pieces of shit.
Driving the highways of American in a string of HEMI powered SRTs is a great way to make mustangs and camaros sweat as some 1500+ HP rolls by in the fast lane. Before any green folks panic about the impact on the environment, you'll be glad to know that every car was well over 20 MPG, despite lots of heavy traffic and construction. See if your camry can pull that off while maintaining the smug mediocrity that is life in an under-powered car that barely boasts any more gains in fuel economy. Some people still like to push that pedal on the right that actually makes a vehicle accelerate. The engineering and technology under the hood of these SRTs offers insane power levels with fuel economy no one would have dared associate with such a power level just a few short years ago.
The SRT crew rolled into town and met members of Amarillo Area Mopars at the world famous Big Texan Steak Ranch. AAM pulled out quite the showing with everything from 60s & 70s muscle cars on up to Vipers and late model Challengers. Among the local SRT population was Kat with her Crossfire, which just happens to be the fastest SRT-6 in the world. AAM was also glad to welcome back John, who drove all the way down from Kansas in his Green with Envy Challenger. Later on in the evening some red touched the landscape in the form of an SRT Charger and an SRT Viper. A couple others snaked their way in, including a Ram SRT10.
Of course, there was the usual landscape of color thanks to the AAM diehards. Everything from a 68 Dart to 2010 Challenger R/Ts were on hand to welcome the SRT Tour. Steve came all the way down from Borger in his Roadrunner and we had a few just miss getting to join us due to last minute issues that arose.
All-in-all it was a great night for everyone involved. The folks at SRT got to show off the new product line, check out some great local Mopars, and got to experience the world famous Big Texan Steak Ranch!
We were honored to be among one of the stops chosen and slated on the tour and thanks goes to the folks at SRT.
The real winner however was the regular folks travelling up-and-down I-40. There was a steady stream of curious on lookers all night. Many walking back to their cars to pick up cell phones or cameras to capture what was yet another special evening for the folks in Amarillo Area Mopars.
We hope everyone had a great time and send our best wishes to the crew as they head off for St. Louis. Have fun, stay safe, and thanks for including us in your travels!
And now that you've read all that, how about some more pictures?:
Color match:

Group Shots:


SRT Line-up:


Anyone catch the reason I took this picture?:

SRT vs AAM:

Cool shot with the Mopar 10 vs SRT:


Nice plug for the guests and the venue:

The people that made the turnout:


SRT Girls with the Band:

The Official SRT Tour Group Photo:

Fore more info on the SRT Tour, check out the official SRT Tour Website: http://www.driversrt.com/tour
You can also find more on the AAM Network of Sites: http://www.amarilloareamopars.com
Don't forget to mark your calendars and join us for Chryslers in the Canyon IV:
http://chryslersinthecanyon.amarilloareamopars.com
And don't forget AAM is on Twitter, Facebook, and Google +
Hey, you're still reading...great.
As always, I hit up everyone I can in an attempt to get the official "Mopar 10" Spreadsheet. None of the SRT crew were aware of the spreadsheet or had any info to offer up.
I was the last to leave and after telling them about some stuff to look for on their way to St. Louis (most notably the Largest Cross in the Western Hemisphere in Groom, which they did check out). It also was dark in the parking lot when we were coming out. I was talking to Hammer about exhaust tones with MDS engaged and he commented on the painted brake calipers and asked if I had done that, or if the factory did. As I told him that was me, I sat down some posters to give out to those who attended and didn't get one.
When I did that, he also noticed the blue footwell lights (ie Cloud 10 Phase 1). Since he liked that I went ahead and flipped the switch for the underbody lights (Cloud 10, Phase II). He really liked that. We talked a while longer and wondered what the others were still doing in the Big Texan.
They came out and I heard Sean say to Rachel and Jennifer, "Look it's floating on a cloud!" I told him that was ironic, since I actually dubbed it "Cloud 10." He added, "I usually hate cars with underbody lights...but that actually looks really good!" He went on to mention the other car he liked it on, an old ford street rod with purple underbody.
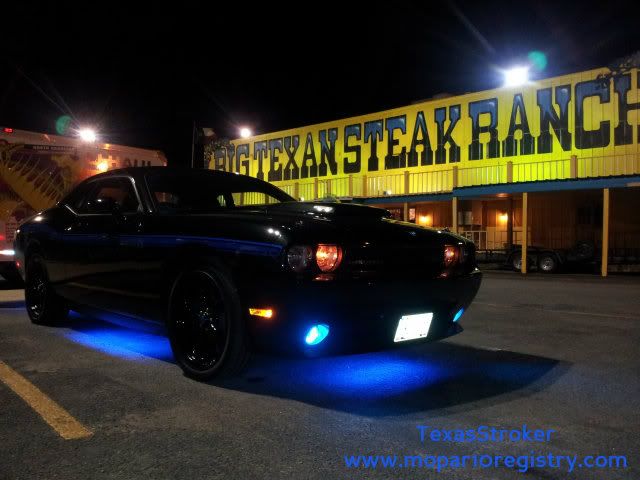
That was a nice treat for myself and the M10 as the 2012 SRT Tour drivers officially endorsed "Cloud 10." I've said since I've done it that it isn't for everyone, but that I like it, I think it suits the car, and it just looks killer in my opinion. I'm sure a lot of people down the road will hate it, but in all honesty, if you aren't out and I don't have the switch on no one knows it is there. That said, for everyone that dislikes it, I think you need to see it in person before you judge. So far, the feedback has been overwhelmingly positive. The real highlight for the M10 was getting shot for the SRT Tour Instagram and then Tweeted! For those scoring at home, that is 2 Tweets for the M10 from Official Dodge media outlets!
Here is the Tweet:
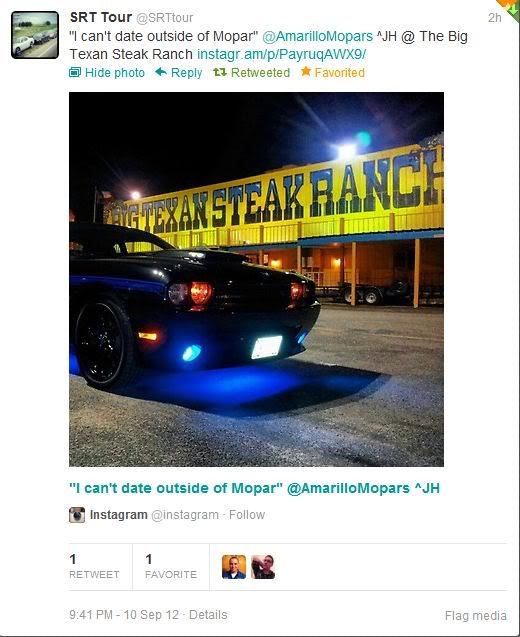
Here is the picture from the Tweet:
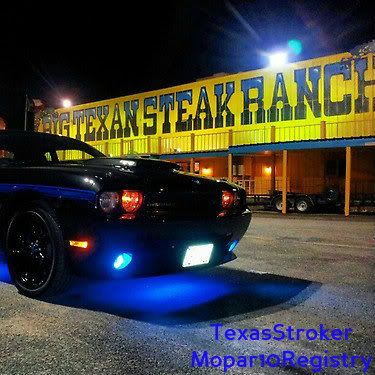
And here is the Full Size Pic John was nice enough to e-mail me:
Tuesday, May 22, 2012
Mopar 10 Registry Shirts
I have wanted to come up with some slick shirts to promote the Mopar 10 Registry and last week I sat down and crafted what I think is a cool design.
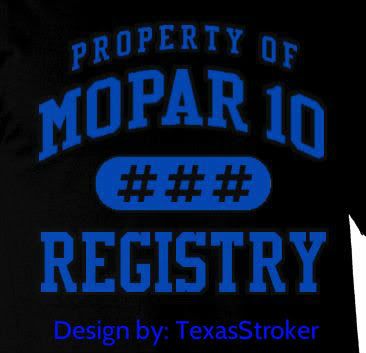
I basically went with the "Property of" concept and then incorporated "Mopar 10 Registry." The issue I had up front was what to do in the circle (usually XXL etc). My first thought was, "Having the car number would be killer!" That logic still stands correct, but I have not been able to find an online outfit that would allow for the changing the number some 500 times. Granted, I could design 500+ shirts, but that is a bit overkill.
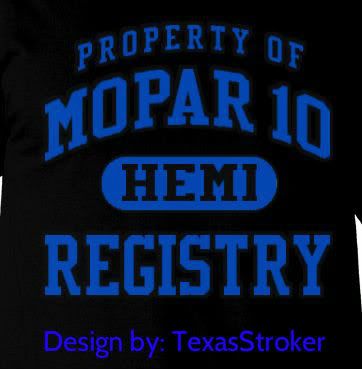
The next step was to simplify it with something everyone would like, "HEMI." This looks great, but lacks that wow factor of having the actual car number.
With that said, I went on to the back. With the "Property of" design I still needed to plug the website (yes we have a website and a forum folks, links will be later in this post). My idea was to list the url along with the slogan. I never really took input on this, but when I posted it I got nothing but good feedback and I really think it fits the car.
I was now content, but still wanted to have the car numbers as an option.
As of posting this, it looks like that may happen. I have found a local outift that is willing to produce the shirts on a one-by-one basis without killing us price wise. I have a shirt made with my car number and HEMI that I am going to pick up sometime this week. Once I have them, I'll post the actual product on the M10 Registry and the Mopar 10 Registry Forum.
Here are the designs I came up with...and before proceeding, fear not...these will be available in Blue, Red, and Silver to accommodate everyone!
Property of Mopar 10 Registry "HEMI" Front:

Property of Mopar 10 Registry "Car Number" Front:

Property of Mopar 10 Registry Back:

So, what do you think? Pretty snazzy, eh? As soon as I get the real article in hand I will post it up on the M10 Registry Website, Forum, and Facebook.
Here are the links in case you didn't know:
Mopar 10 Registry: http://www.mopar10registry.com
Mopar 10 Forum: http://www.lonestarmopars.com/mopar10/forum
Mopar 10 Facebook: http://www.facebook.com/mopar10registry
I basically went with the "Property of" concept and then incorporated "Mopar 10 Registry." The issue I had up front was what to do in the circle (usually XXL etc). My first thought was, "Having the car number would be killer!" That logic still stands correct, but I have not been able to find an online outfit that would allow for the changing the number some 500 times. Granted, I could design 500+ shirts, but that is a bit overkill.
The next step was to simplify it with something everyone would like, "HEMI." This looks great, but lacks that wow factor of having the actual car number.
With that said, I went on to the back. With the "Property of" design I still needed to plug the website (yes we have a website and a forum folks, links will be later in this post). My idea was to list the url along with the slogan. I never really took input on this, but when I posted it I got nothing but good feedback and I really think it fits the car.
I was now content, but still wanted to have the car numbers as an option.
As of posting this, it looks like that may happen. I have found a local outift that is willing to produce the shirts on a one-by-one basis without killing us price wise. I have a shirt made with my car number and HEMI that I am going to pick up sometime this week. Once I have them, I'll post the actual product on the M10 Registry and the Mopar 10 Registry Forum.
Here are the designs I came up with...and before proceeding, fear not...these will be available in Blue, Red, and Silver to accommodate everyone!
Property of Mopar 10 Registry "HEMI" Front:
Property of Mopar 10 Registry "Car Number" Front:
Property of Mopar 10 Registry Back:

So, what do you think? Pretty snazzy, eh? As soon as I get the real article in hand I will post it up on the M10 Registry Website, Forum, and Facebook.
Here are the links in case you didn't know:
Mopar 10 Registry: http://www.mopar10registry.com
Mopar 10 Forum: http://www.lonestarmopars.com/mopar10/forum
Mopar 10 Facebook: http://www.facebook.com/mopar10registry
Subscribe to:
Posts (Atom)